Want to look flawless in every photo you take? The right makeup can make all the difference between a good picture and a stunning one.
But knowing exactly how to apply your makeup for the camera can be tricky. If you want your features to pop, avoid unwanted shine, and feel confident in front of the lens, these simple tips will change the way you prepare for pictures forever.
Keep reading, and discover how to make every photo your best one yet.

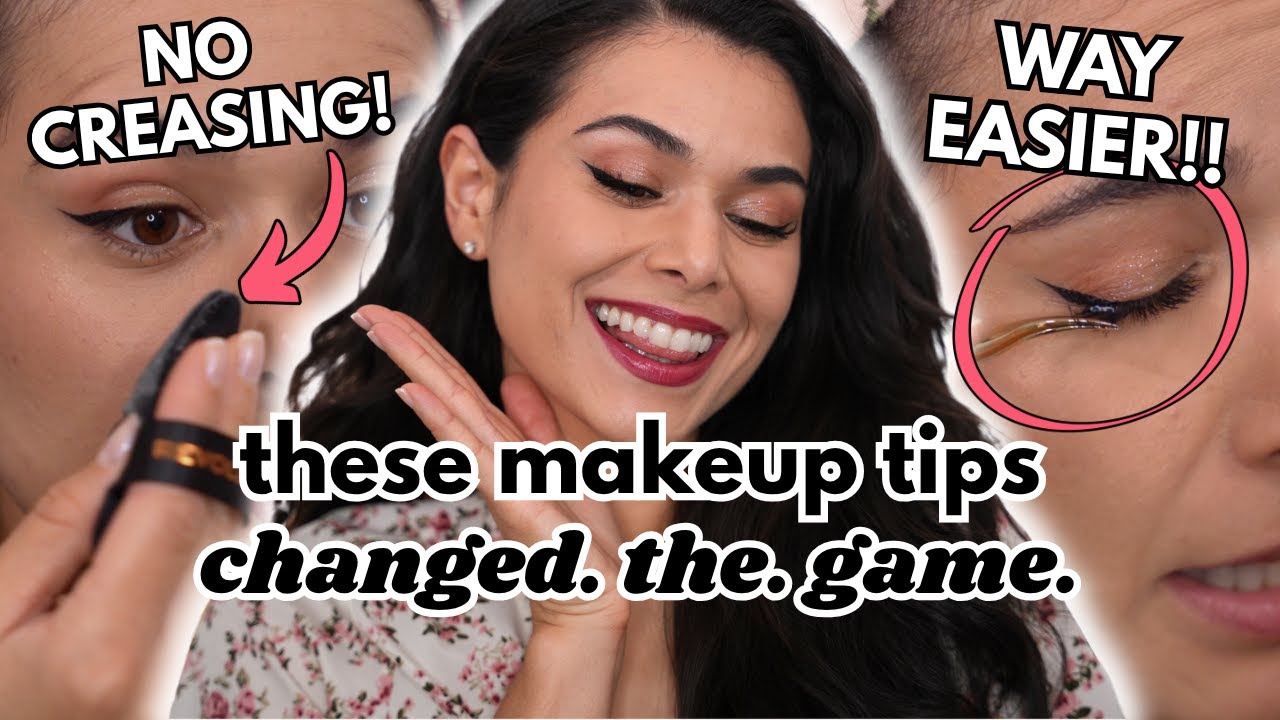
Credit: www.youtube.com
Prepping Your Skin
Prepping your skin is key for flawless makeup photos. Clean, smooth skin helps makeup sit better. It also prevents shine and uneven texture in pictures.
Cleansing And Moisturizing
Start with a gentle cleanser to remove dirt and oils. Clean skin creates a fresh canvas for makeup. Use a moisturizer suited to your skin type. Hydrated skin looks healthy and glowy in photos.
- Choose a mild cleanser for daily use.
- Pat your face dry with a soft towel.
- Apply moisturizer while skin is still damp.
- Wait a few minutes for the moisturizer to absorb.
Priming For Smooth Base
Apply a primer after moisturizing. Primers help fill in pores and fine lines. They create an even surface for foundation. This reduces makeup slipping and patchiness.
- Select a primer that suits your skin type.
- Use a small amount and spread evenly.
- Focus on areas prone to oiliness or dryness.
- Let the primer set for a minute before applying foundation.
Credit: www.youtube.com
Choosing The Right Foundation
Choosing the right foundation is key to achieving flawless makeup that looks stunning in pictures. It sets the base for the entire look and can either enhance your natural beauty or create an unnatural appearance. Knowing how to pick the right formula and shade makes a huge difference, especially under camera lights.
Matching Your Skin Tone
Finding a foundation shade that matches your skin tone perfectly is essential. Test shades on your jawline or wrist instead of your hand because these areas better represent your face color.
Look at the shade in natural daylight to avoid surprises in photos. Does the foundation blend seamlessly without leaving a noticeable line? If not, keep trying until it disappears into your skin.
Consider your undertones—are they warm, cool, or neutral? This small detail can change how the foundation looks on camera. If you struggle to identify your undertone, asking a beauty consultant or using online quizzes can help.
Long-lasting Formulas
Choose a foundation that stays put for hours, especially if you’ll be in front of the camera for a long time. Look for formulas labeled as long-wear, matte, or waterproof to avoid shine and smudging.
Think about your skin type too—oily skin benefits from matte foundations, while dry skin looks better with hydrating formulas. Sometimes mixing a small amount of moisturizer into your foundation can help it last longer and look natural.
Have you ever seen foundation fade or patch in photos? Testing your foundation by wearing it for a few hours before the event can save you from surprises. You’ll know if it holds up under heat, sweat, or flash photography.
Concealing Imperfections
Concealing imperfections is essential for flawless photos. Cameras capture every detail, making small flaws more visible. Using the right makeup can hide these imperfections. This creates a smooth, even skin tone that looks natural on camera.
Good concealing boosts confidence and enhances your overall look. It helps focus attention on your best features. Proper techniques make makeup last longer under bright lights and flashes.
Targeting Dark Circles
Dark circles can make you look tired in pictures. Choose a concealer one or two shades lighter than your skin tone. This brightens the under-eye area instantly.
- Apply small dots of concealer under your eyes.
- Use a gentle tapping motion with your ring finger or a sponge.
- Blend well to avoid harsh lines.
- Set with a light dusting of translucent powder to prevent creasing.
Covering Blemishes
Blemishes draw unwanted attention in photos. Use a concealer that matches your skin tone exactly. This helps blend the spot seamlessly with your skin.
- Dab a small amount directly on the blemish.
- Pat gently until the product covers the area.
- A clean brush or sponge helps blend edges softly.
- Layer if needed, but keep it thin to avoid cakiness.
Enhancing Facial Features
Enhancing facial features helps photos look natural and flattering. Makeup can add depth and brightness to your face. It shapes your face and highlights your best parts. Simple techniques make your features stand out on camera. This section covers tips on contouring, highlighting, and blush placement.
Contouring And Highlighting
Contouring adds shadows to create definition. Use a shade slightly darker than your skin tone. Apply it to areas like cheek hollows, jawline, and sides of the nose.
Highlighting brings light to the high points of your face. Use a lighter shade or shimmer on cheekbones, the bridge of the nose, and the brow bone.
- Blend well to avoid harsh lines.
- Use matte products for contouring and shimmer for highlighting.
- Focus on natural shapes and angles.
This contrast makes your face look sculpted and lively in photos.
Blush Placement Tips
Blush adds a healthy glow and warmth to your face. Place it on the apples of your cheeks. Smile gently to find the right spot.
For a youthful look, sweep blush slightly upward toward the temples. Avoid placing too low or too close to the nose.
- Choose a blush color that matches your skin tone.
- Use a light hand; build color gradually.
- Blend edges softly for a natural finish.
Proper blush placement makes your face appear fresh and vibrant on camera.
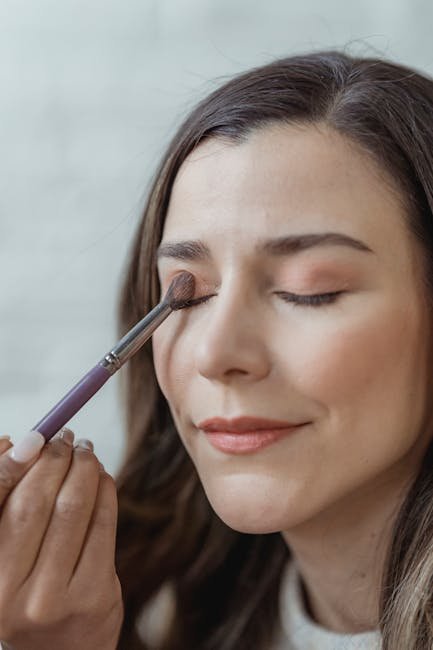
Eye Makeup Tips
Eye makeup plays a crucial role in how your photos turn out. It highlights your eyes, making them stand out and capture attention. Proper eye makeup balances colors and shapes to complement your face. It also prevents harsh shadows or washed-out looks in pictures.
Simple techniques can enhance your eyes and create depth. Focus on clean lines, even color, and natural shapes. Avoid heavy makeup that might look too dark or smudged on camera.
Defining The Brows
Well-shaped brows frame your eyes perfectly. Use a brow pencil or powder to fill sparse areas with light strokes. Follow your natural brow shape for the best results.
Brush brows gently with a spoolie to blend the product and soften the look. Avoid over-darkening to keep brows natural. Defined brows make your eyes look sharper in photos.
Choosing Eyeshadow Shades
Select eyeshadow colors that enhance your eye color and skin tone. Neutral shades like browns, taupes, and soft golds work well on most skin tones. They add depth without overpowering your eyes.
Use matte shades for the crease and shimmer on the lids for a subtle glow. Blend colors smoothly to avoid harsh lines. Avoid overly bright or neon colors, which may not photograph well.
Applying Eyeliner And Mascara
Apply eyeliner close to the lash line for definition. A thin line creates a natural look; thicker lines add drama. Use waterproof formulas to avoid smudges during shoots.
Coat lashes with mascara to open your eyes. Wiggle the brush at the base, then sweep upward for volume. Apply two coats for fuller lashes but avoid clumps. Well-defined lashes make your eyes pop in photos.
Lip Color Selection
Choosing the right lip color is crucial for making your photos pop. The shade you pick can brighten your face, complement your outfit, and even change the mood of your picture. Getting this right means thinking about your skin tone, the lighting, and the style you want to project.
Picking Flattering Shades
Not every lip color suits every skin tone. To find your best match, consider whether your skin has warm, cool, or neutral undertones. For warm undertones, shades like coral, peach, or warm reds work beautifully. Cool undertones pair well with berry, plum, or blue-based reds.
Think about the setting too. If the photo shoot is outdoors with natural light, softer shades like nude or rose can look fresh and natural. Indoor shoots with artificial lighting might need bolder colors to stand out. Have you tested different shades in your camera or phone before the shoot?
Long-lasting Lip Products
Nothing ruins a photo session faster than lipstick that fades or smudges. Choose lip products designed for long wear, such as matte lipsticks or liquid lip stains. These stay put longer and require fewer touch-ups during your shoot.
Layering can help too. Start with a lip liner to define your lips and prevent feathering. Apply your chosen lip color, then blot with a tissue. Add a second layer for intensity and staying power. Have you ever tried setting your lipstick with a translucent powder? It can lock in color without drying your lips.
Setting Your Makeup
Setting your makeup is the final touch that ensures your look stays flawless in photos. Without proper setting, makeup can fade, smudge, or become oily under camera lights. Taking a few extra moments to lock your makeup will help you feel confident and look fresh throughout your photoshoot or event.
Using Setting Spray
Setting spray is a must-have for keeping your makeup intact. After finishing your makeup, hold the spray about 8-10 inches from your face and mist evenly. This creates a lightweight barrier that prevents makeup from melting or transferring.
Choose a setting spray that suits your skin type—hydrating sprays work well for dry skin, while mattifying sprays are ideal if you tend to get oily. I once forgot setting spray before a long outdoor shoot, and my makeup started sliding halfway through—never again! Have you noticed how just a few spritzes can make your makeup last through sweat and tears?
Powder For Shine Control
Shiny skin can ruin a picture by reflecting too much light. Using a translucent powder helps absorb excess oil and keeps your face looking matte. Apply it lightly with a fluffy brush, focusing on your T-zone where shine appears most.
Pressed powders are great for touch-ups during the day, but a finely milled loose powder offers a softer finish for photos. Avoid over-powdering, which can make your skin look dry or cakey. Instead, build up slowly and check your look in natural light to find the right balance.
Lighting And Angles For Photos
Lighting and angles can make or break your photos, especially when it comes to makeup. The way light hits your face affects how colors show up and how shadows form. Angles, on the other hand, influence how your features are highlighted or softened.
Adjusting Makeup For Different Lights
Natural light reveals true colors, so it’s great for soft, fresh makeup looks. If you’re shooting indoors under artificial lights, your makeup might need to be a bit stronger to avoid looking washed out.
Under warm lighting, like incandescent bulbs, cool-toned makeup can appear muted. Try adding a touch of warmth with peachy blush or bronzer to balance this out. In contrast, cool fluorescent lights might make your skin look pale; using a bit more foundation or a vibrant lip color can help.
Think about where the light is coming from too. Front lighting reduces shadows and highlights your entire face, while side lighting creates depth but can exaggerate imperfections. Adjust your foundation and contour accordingly to ensure your face looks balanced.
Posing For Best Results
Small changes in your pose can dramatically improve how your makeup looks in photos. Tilting your chin slightly down and turning your face at a slight angle helps define your jawline and cheekbones.
Try to avoid harsh shadows by positioning yourself where light hits evenly. If you notice unflattering shadows, move closer to the light source or change your angle. Remember, the goal is to highlight your best features, not hide behind shadows.
Have you noticed how some angles make your eyes pop more? Experiment with angles that emphasize your eye makeup. A subtle head tilt combined with a soft smile can make your makeup appear more vibrant and alive on camera.
Quick Fixes On The Go
Quick fixes on the go are lifesavers when you need to look camera-ready in an instant. Whether you’re at a party, work event, or just snapping a spontaneous selfie, small touch-ups can make a big difference. Let’s dive into easy tricks that keep your makeup fresh and photo-perfect without the hassle.
Blotting Shine
Excess shine can ruin a great photo by making your skin look oily rather than glowing. Carry blotting papers in your bag—they’re thin, portable, and instantly absorb oil without messing up your makeup.
If you don’t have blotting papers handy, try lightly pressing a clean tissue on shiny areas like your forehead, nose, and chin. Avoid rubbing, as this can smudge your makeup.
Wondering how to keep shine away longer? Use a mattifying primer before makeup, and set your look with a translucent powder. These simple steps reduce the need for constant blotting.
Touching Up Lips And Eyes
Smudged lipstick or faded eyeshadow can steal the spotlight in your photos. Keep a small lip brush or your favorite lipstick shade in your bag for quick lip touch-ups.
For eyes, a mini eyeliner pencil or mascara with a spoolie can revive your look fast. Swipe a little liner to sharpen your lash line or re-curl lashes with a travel-size curler to open up your eyes.
Have you tried carrying multipurpose products? A tinted balm works for lips and cheeks, cutting down what you need to pack while keeping your look fresh. This trick saves space and time when you’re in a rush.

Credit: www.shefinds.com
Frequently Asked Questions
How To Choose Makeup For Picture-perfect Skin?
Choose makeup that matches your skin tone and type. Use matte foundations to reduce shine and avoid flashback. Opt for long-lasting products to keep your look fresh. Highlight key features subtly to enhance natural beauty without overdoing it.
What Makeup Techniques Work Best For Photography?
Use contouring to define your face and add depth. Apply a light layer of powder to set makeup and avoid shine. Blend well to prevent harsh lines. Use waterproof mascara and eyeliner to maintain sharpness throughout the shoot.
How To Avoid Makeup Flashback In Photos?
Avoid products with high SPF or silica, as they cause flashback. Choose foundations and powders labeled “flash-friendly” or “photo-safe. ” Test your makeup under flash lighting before the shoot to ensure no white cast appears.
Which Makeup Colors Look Best On Camera?
Neutral tones like browns, peaches, and soft pinks work well on camera. Avoid overly bright or neon shades that can appear harsh. Use warm tones to complement your skin and enhance facial features naturally.
Conclusion
Achieving stunning makeup for pictures is simpler than it seems. Start with a clean face. Foundation should match your skin tone. Concealer hides blemishes effectively. Blush adds a natural glow. Don’t forget mascara for bold lashes. Lipstick completes your look.
Practice makes perfect. Experiment with colors and styles. Understand what works best for you. A little effort goes a long way. Capture those moments with confidence. Now you’re ready for the camera. Smile and shine through every shot. Remember, makeup is about enhancing your natural beauty.
Keep it fun and enjoy the process.
