Are you curious about achieving glowing, smooth skin without stepping out of your front door? Microdermabrasion at home might just be your ticket to a radiant complexion.
Imagine waking up to fresher, rejuvenated skin without the hefty salon price tag. It’s not just a dream; it’s a reality you can create right in your bathroom. You don’t need to be a skincare expert to get it right.
With the right tips and a little bit of patience, you can transform your skin care routine. Ready to learn how to do microdermabrasion like a pro? Let’s dive into the secrets that will make your skin the envy of all your friends. You won’t want to miss a single detail!

Credit: www.vevor.ca
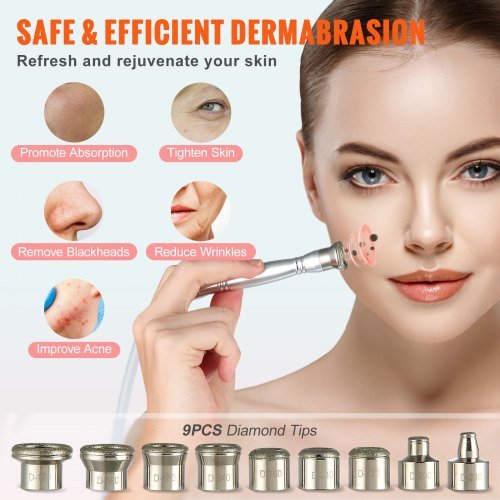
Choosing The Right Microdermabrasion Tool
Choosing the right microdermabrasion tool is key for safe and effective home treatments. The right device suits your skin type and meets your skincare goals. Understanding different options helps you pick a tool that fits your needs and budget. This section guides you through types of devices, important features, and cost considerations.
Types Of Home Devices
- Crystal Microdermabrasion:Uses tiny crystals to exfoliate skin. Good for mild exfoliation.
- Diamond Tip Microdermabrasion:Uses a rough diamond tip to remove dead skin. Works well on sensitive skin.
- Suction-Based Devices:Uses vacuum suction to lift and remove dead skin cells. Often combined with crystal or diamond tips.
Key Features To Look For
- Adjustable Intensity:Lets you control exfoliation strength for safety.
- Multiple Tips:Offers variety for different skin areas and concerns.
- Good Suction Power:Ensures effective removal of dead skin.
- Ease of Cleaning:Prevents bacteria buildup and keeps device safe.
- Ergonomic Design:Comfortable to hold and use for better control.
Budget Considerations
Microdermabrasion tools vary in price from affordable to premium. Basic models suit beginners and simple skin needs. Higher-end devices offer more features and durability. Consider how often you will use the tool and your skin’s sensitivity. Investing in a quality device can save money on professional treatments.
Preparing Your Skin Before Treatment
Preparing your skin before microdermabrasion treatment is crucial for the best results. This step helps remove dirt, oil, and dead skin cells. It also reduces the risk of irritation during the process. Proper preparation ensures your skin is smooth and ready to absorb the benefits of microdermabrasion.
Cleansing Techniques
Start by washing your face with a gentle cleanser. Use lukewarm water to open your pores slightly. Avoid harsh soaps or scrubs that can irritate the skin. Pat your face dry with a clean towel. Clean skin helps the microdermabrasion device work more effectively.
Exfoliation Tips
Exfoliate your skin lightly a day before treatment. Use a mild scrub or an exfoliating cloth. This removes dead skin cells and smooths the surface. Do not over-exfoliate, as this can cause redness or sensitivity. Keep your skin calm and balanced for the best outcome.
Avoiding Sun Exposure
Stay out of the sun for at least 48 hours before treatment. Sun exposure can make your skin sensitive and prone to damage. If you must go outside, wear a broad-spectrum sunscreen. Protecting your skin reduces the chance of irritation or burns during microdermabrasion.
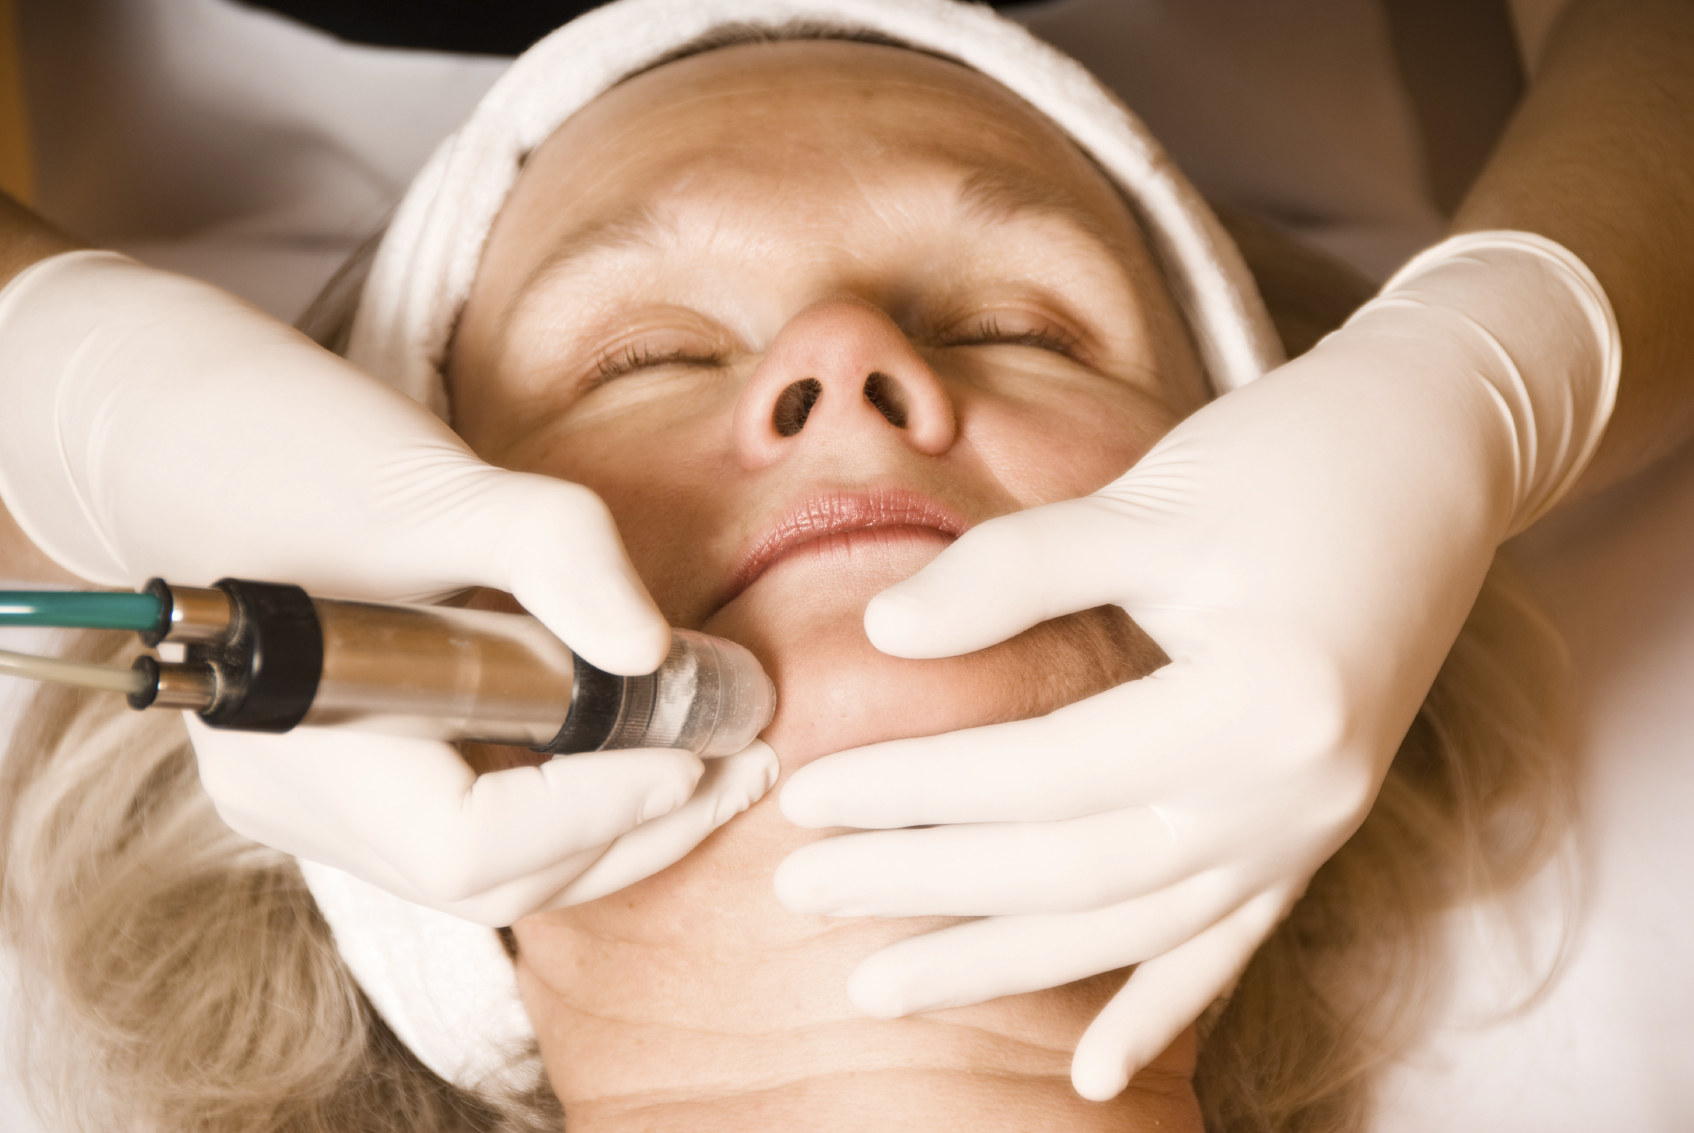
Step-by-step Microdermabrasion Process
The microdermabrasion process at home requires care and attention. Following a clear routine helps achieve smooth, glowing skin. Understanding each stage makes the experience safe and effective. The process involves preparing the device, applying it correctly, and knowing how often to use it. This guide breaks down these steps for easy follow-through.
Setting Up Your Device
Clean your microdermabrasion tool before use. Attach the correct tip for your skin type. Check the device’s power level and adjust it low to start. Choose a quiet, well-lit area for your session. Have a mirror nearby to monitor your progress. Keep a clean towel handy for wiping skin or device.
Safe Application Methods
- Start with dry, cleansed skin. No oils or makeup.
- Hold the device flat against the skin.
- Move it slowly in small circles or straight lines.
- Avoid staying too long on one spot.
- Do not press hard; gentle suction is enough.
- Avoid sensitive areas like eyes and lips.
Stop if you feel pain or extreme redness. Always be gentle to avoid irritation.
Duration And Frequency
Limit each session to about 5 to 10 minutes. Focus on one area at a time. Beginners should start with once a week. Skin needs time to heal between sessions. Increase frequency only after skin adjusts. Overuse can cause dryness or redness. Adjust based on skin’s response and sensitivity.
Post-treatment Care For Best Results
Post-treatment care is key to getting the best results from microdermabrasion at home. Your skin needs gentle care to heal and glow. Proper care can reduce redness and avoid irritation. Follow these simple steps to help your skin recover smoothly.
Hydration And Moisturizing
Hydrating your skin keeps it soft and smooth after treatment. Use a gentle, fragrance-free moisturizer. Apply it several times a day, especially after washing your face. Drink plenty of water to help your skin stay hydrated from inside. Avoid heavy creams that might clog pores.
Soothing Products To Use
Choose products that calm your skin. Look for ingredients like aloe vera, chamomile, or cucumber extract. These help reduce redness and irritation. Avoid harsh chemicals or exfoliants for at least a week. Use cold compresses if your skin feels warm or tight.
Sun Protection Essentials
Your skin is very sensitive after microdermabrasion. Protect it from the sun to prevent damage. Use a broad-spectrum sunscreen with at least SPF 30 daily. Wear a wide-brimmed hat and avoid direct sunlight. Reapply sunscreen every two hours if you are outside.
Common Mistakes To Avoid
Microdermabrasion at home can deliver amazing results, but it’s easy to slip into habits that harm your skin instead of helping it. Avoiding common mistakes will keep your skin healthy and glowing. Let’s look at some pitfalls you should watch out for to make your at-home treatments safe and effective.
Overuse And Skin Irritation
Using microdermabrasion tools too often can irritate your skin. I once tried daily sessions hoping for faster results, but my skin ended up red, dry, and flaky. Your skin needs time to heal between treatments—stick to 1-2 times per week depending on your skin type.
Watch for signs of irritation like redness, burning, or excessive dryness. If these appear, give your skin a break and hydrate well. Remember, more isn’t always better when it comes to exfoliation.
Ignoring Skin Sensitivities
Not all skin reacts the same way to microdermabrasion. Sensitive or acne-prone skin can become inflamed if you use the wrong pressure or device settings. I learned this the hard way when I ignored my skin’s sensitivity and ended up with a breakout instead of a glow.
Know your skin type and adjust the intensity accordingly. If your skin is delicate, choose gentler devices or lower settings. Always listen to your skin’s feedback during the process.
Skipping Patch Tests
Many skip patch tests before using new devices or skincare products, risking unexpected reactions. Performing a patch test on a small skin area helps identify allergic reactions or irritation before full application. It’s a simple step that can save you from a lot of discomfort.
If you try a new exfoliating tool or product, test it on your inner wrist or behind your ear and wait 24-48 hours. If there’s no redness or itching, it’s safer to proceed. Why risk your face without this quick check?

Credit: www.amazon.com
Boosting Results With Complementary Skincare
Enhancing the effects of microdermabrasion at home requires more than just the procedure itself. Complementary skincare plays a key role in maintaining smooth, radiant skin after treatment. Using the right products and habits supports skin health and extends the benefits of microdermabrasion.
Simple steps can help your skin heal faster and glow longer. Focus on gentle care and consistent routines. This approach helps your skin stay balanced and prevents irritation.
Serums And Treatments
Serums with antioxidants and hydrating ingredients boost skin recovery. Look for products with vitamin C, hyaluronic acid, or peptides. These help protect and repair the skin barrier.
Apply serums after microdermabrasion for better absorption. Avoid harsh or strong active ingredients immediately after treatment. Use gentle products to calm and nourish your skin.
Healthy Lifestyle Habits
Good skin starts from within. Drink plenty of water to keep skin hydrated. Eat foods rich in vitamins and minerals for skin repair. Sleep well to help your skin regenerate overnight.
Avoid smoking and limit sun exposure. Use sunscreen daily to protect your fresh skin from damage. These habits support lasting results and prevent premature aging.
Regular Skin Assessments
Check your skin regularly to notice changes or issues early. Monitor for redness, dryness, or irritation after treatments. Adjust your routine based on how your skin responds.
Consult a dermatologist if you see unusual reactions. Regular assessments help you maintain healthy skin and improve microdermabrasion outcomes over time.
When To Seek Professional Help
Knowing when to seek professional help during your at-home microdermabrasion routine is crucial. While DIY treatments can be effective, certain situations require expert intervention to avoid complications and ensure the best results. Understanding the warning signs and your skin’s unique needs can save you from unnecessary damage.
Signs Of Adverse Reactions
After a session, watch for unusual redness that lasts more than a day or intense itching and burning sensations. If your skin starts peeling excessively or develops painful sores, it’s a clear signal to stop and consult a dermatologist.
Sometimes, minor irritation is normal, but persistent swelling or blistering means your skin is reacting badly. Don’t ignore these signs—early professional care can prevent scarring or infection.
Complex Skin Conditions
If you have conditions like rosacea, eczema, or severe acne, DIY microdermabrasion might do more harm than good. These issues make your skin more sensitive and prone to irritation.
Before trying any at-home device, ask yourself if your skin needs tailored treatment beyond what a basic tool can offer. Professionals can customize treatments that respect your skin’s limitations and improve its condition safely.
Professional Microdermabrasion Benefits
Professionals use advanced equipment that adjusts suction and exfoliation depth precisely, reducing risks for sensitive or problem skin. Their expertise helps target specific concerns like fine lines, pigmentation, or uneven texture more effectively.
Plus, getting a treatment done by an expert often includes a skin analysis and follow-up care instructions. This personalized approach ensures your skin heals properly and benefits fully from the procedure.
Credit: aestheticbackbar.com
Frequently Asked Questions
What Is Microdermabrasion At Home?
Microdermabrasion at home is a skincare treatment using devices or crystals. It gently exfoliates dead skin cells. This improves skin texture, brightness, and appearance without professional help. It is safe when done correctly and regularly.
How Often Should I Do Microdermabrasion At Home?
For home microdermabrasion, perform the treatment once every 1 to 2 weeks. Overuse can irritate or damage your skin. Always follow product instructions and monitor your skin’s response for best results.
What Are The Best Tips For Home Microdermabrasion?
Cleanse your skin thoroughly before starting. Use gentle pressure to avoid irritation. Moisturize afterward to soothe skin. Always patch test new devices or products. Avoid sun exposure and use sunscreen after treatment.
Can Microdermabrasion At Home Treat Acne Scars?
At-home microdermabrasion can help reduce mild acne scars by promoting skin renewal. However, deeper scars may require professional treatments. Consistency and patience are key for visible improvement over time.
Conclusion
Microdermabrasion at home can refresh your skin safely. Use gentle tools and follow simple steps carefully. Clean your face before starting to avoid irritation. Always moisturize after the treatment to keep skin soft. Take breaks between sessions to let skin heal well.
Patience helps you see better results over time. Small efforts lead to a brighter, smoother complexion. Enjoy the process and care for your skin daily. Your skin will thank you with a healthy glow.
