
Want to master the art of smokey eye makeup and turn heads wherever you go? You’re in the right place.
This look is bold, mysterious, and perfect for adding a touch of drama to your eyes. But if you’ve ever tried it and ended up with a messy, uneven result, don’t worry. You’ll learn simple steps that anyone can follow to create a flawless smokey eye.
Keep reading, and soon you’ll have the confidence to rock this timeless style like a pro.
Choosing The Right Tools
Choosing the right tools is the foundation of creating a stunning smokey eye. Without the proper brushes, eyeshadows, and base products, achieving that perfect blend and depth becomes a struggle. Your tools can make the difference between a messy look and a sharp, sultry finish.
Essential Brushes
Investing in the right brushes is crucial. A dense, flat shader brush helps pack color onto your lids. A fluffy blending brush softens harsh edges and creates a seamless gradient. A small, precise brush allows you to add detail along the lash line or in the crease.
I once tried using a single brush for my entire smokey eye and ended up with uneven color and patchy blending. Using multiple specialized brushes gave me control and a polished look. Consider brushes with synthetic bristles for eyeshadows—they hold pigment well and are easier to clean.
Selecting Quality Eyeshadows
Not all eyeshadows perform equally. Pick shadows with rich pigmentation and smooth texture. Matte shades work best for the crease and outer corners, while shimmery or satin finishes add dimension to the lids.
Cheap eyeshadows can be chalky or patchy, making blending frustrating. I recommend testing shadows in natural light to see true color payoff. Don’t hesitate to mix darker shades to customize your perfect smokey tone.
Primer And Eyeliner Basics
Primer is your secret weapon. It prevents creasing and makes colors pop. Apply a thin layer to your lids before shadows for long-lasting wear.
Choose a pencil or gel eyeliner that glides on smoothly. Smudge it slightly with a brush or your finger to enhance the smokey effect. Avoid waterproof liners at first—they can be tough to blend.
Have you ever struggled with eyeshadow fading by midday? Primer can change that experience entirely, keeping your smokey eye intact through busy days and nights.

Credit: www.youtube.com
Preparing Your Eyelids
Preparing your eyelids is the foundation of a flawless smokey eye look. Without a smooth, well-prepped base, eyeshadow can crease, fade, or smudge quickly. Taking a few extra minutes to properly care for your eyelids can make all the difference in the intensity and longevity of your makeup.
Cleansing And Moisturizing
Start by gently cleansing your eyelids to remove any oil, dirt, or leftover makeup. Use a mild cleanser or micellar water on a cotton pad for a fresh canvas. This step helps your eyeshadow stick better and prevents patchiness.
After cleansing, apply a lightweight, oil-free moisturizer designed for sensitive skin. Avoid heavy creams that can cause your eyeshadow to slide off. A well-moisturized eyelid feels comfortable and creates a smooth surface for applying makeup.
Applying Primer For Longevity
Primer is your best friend when doing a smokey eye. It locks your eyeshadow in place and intensifies the colors. Choose a primer that matches your skin tone or is transparent.
Apply a thin, even layer over your entire eyelid and gently blend it out. This creates a tacky base that grips the eyeshadow, reducing fallout and fading throughout the day. Have you noticed your eyeshadow fading by midday? Primer can stop that from happening.
Creating The Smokey Base
Creating the smokey base sets the stage for a bold and beautiful eye look. It helps blend colors smoothly and adds depth. A well-made base makes the dark shades stand out. Start with clean, primed eyelids for better color hold. Use soft brushes for blending. Patience is key for a seamless finish.
Applying Transition Shades
Choose a light to medium matte shade close to your skin tone. Apply it to the crease using a fluffy brush. Use gentle back-and-forth motions to blend the color evenly. This shade softens harsh lines and creates a smooth gradient. It acts as a bridge between your skin and darker colors. Build the shade slowly for a natural look.
Building Depth With Dark Colors
Select a dark eyeshadow like charcoal, deep brown, or black. Use a smaller, dense brush for more control. Apply the dark color to the outer corner and along the lash line. Blend carefully into the crease and slightly above it. Layer the color gradually to avoid harsh patches. This step adds drama and dimension to the eyes.
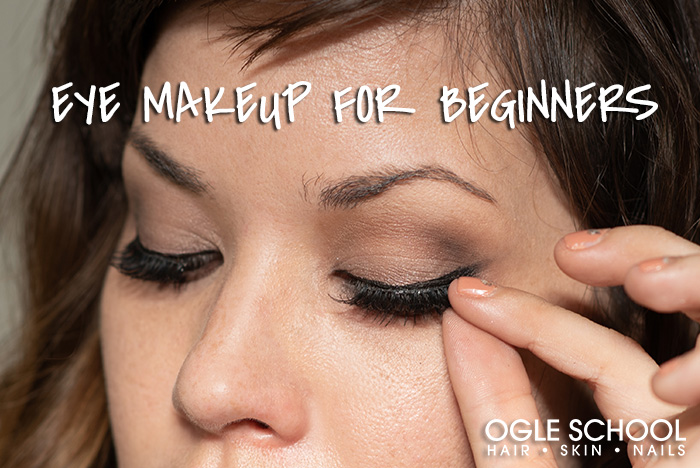
Credit: www.ogleschool.edu
Blending Techniques
Blending is the heart of creating a perfect smokey eye. Without smooth transitions between shades, your look can quickly become patchy or harsh. Mastering blending techniques will help you achieve that seamless gradient that draws attention to your eyes in all the right ways.
Softening Harsh Lines
Harsh lines can ruin the smokey effect by making your makeup look unpolished. To soften these edges, use a clean, fluffy blending brush and gently sweep it back and forth over the lines. Avoid pressing too hard; light pressure helps to diffuse the pigment without removing it.
Try blending in small circular motions to break up the intensity of the color. If you notice a line that’s particularly stubborn, dab a little bit of a neutral shade close to your skin tone and blend it over the edge. This subtle trick helps to fade the harshness without losing depth.
Using Circular Motions
Circular motions are your best friend for achieving that effortless smokey eye. Instead of swiping the brush in straight lines, use gentle circular movements to blend colors into each other smoothly. This technique creates a natural gradient and prevents uneven patches.
Start blending at the outer corner of your eye where the darkest color is, then work your way inward. This ensures the darkest shade stays concentrated at the lash line while gradually lightening as it moves up. Have you noticed how your eyes look more defined but still soft when you blend this way?
Enhancing The Look
Enhancing your smokey eye makeup is all about refining the details that make your eyes pop and your look complete. Small touches can transform a simple smokey eye into a striking feature that captures attention. Let’s focus on how to add depth and brightness for a balanced, flawless finish.
Adding Eyeliner
Eyeliner is essential for defining your eyes and intensifying the smokey effect. Use a pencil or gel liner to draw a smooth line close to your upper lash line. Don’t worry about perfection—smudge it slightly to keep the look soft and sultry.
For more drama, line your waterline with a black or dark brown pencil. If you want a fresh twist, try a deep plum or navy liner. Have you ever noticed how a subtle color change can make your eye color stand out more?
Highlighting The Inner Corners
Brightening the inner corners of your eyes lifts and opens them, balancing the darkness of the smokey shadows. Use a small brush to apply a light, shimmery eyeshadow or highlighter in shades like champagne, pearl, or soft gold.
This simple step can make your eyes look more awake and inviting. Try it next time you want to add a little sparkle without overdoing it. How does a tiny touch of light change your whole makeup vibe?
Finishing Touches
Finishing touches can make or break your smokey eye look. These final steps add depth, drama, and longevity to your makeup. Without them, all your hard work might fade or look incomplete by midday.
Applying Mascara And False Lashes
Start by curling your lashes to open up your eyes and give your smokey look a lift. Apply a generous coat of mascara to both upper and lower lashes to add volume and length.
If you want extra drama, false lashes are a game-changer. Choose lashes that suit your eye shape—fuller ones work well for a bold night look, while wispy lashes keep it softer. Make sure to trim them to fit your lash line perfectly.
Don’t rush the glue; wait a few seconds after applying it to make it tacky before placing the lashes. This helps them stick better and last longer. Have you ever had your false lashes fall off at a crucial moment? This trick saves you from that embarrassment.
Setting The Makeup
Lock in your smokey eye with a setting spray or powder to prevent smudging and fading. A light mist of setting spray helps blend all layers seamlessly and gives a fresh finish.
If you prefer powder, lightly dust translucent powder around your eyes to absorb excess oils. Avoid heavy powders that can dull your eye makeup’s richness.
Remember, setting your makeup isn’t just about staying power—it’s about maintaining the intensity of your smokey eye throughout the day or night. How long do you want your look to last? Adjust your setting method accordingly.
Tips For Different Eye Shapes
Smokey eye makeup looks stunning on everyone, but the way you apply it can highlight your unique eye shape better. Adjusting your technique based on your eye shape helps you enhance your natural beauty and avoid common pitfalls like making your eyes look smaller or overly heavy. Let’s explore how to tailor your smokey eye look for round, hooded, and almond eyes.
Round Eyes
If your eyes are round, the goal is to elongate them to create a more balanced look. Focus on applying darker eyeshadow on the outer corners to add length and depth.
- Start with a medium shade on the lid and blend a dark shade outward and slightly upward.
- Keep the inner corners lighter to maintain brightness.
- Use eyeliner along the upper lash line, extending it slightly beyond the outer corner to create a subtle wing.
I once struggled to make my round eyes look less wide, but shifting the darkest color outward made a huge difference. Have you tried extending your shadow beyond the outer edge yet?
Hooded Eyes
Hooded eyes have a fold that can hide part of your eyelid, so your smokey eye should create the illusion of more lid space. Concentrate the darkest shades above the crease rather than on it.
- Apply a transition shade just above your natural crease.
- Blend the dark shadow upwards to lift your eyes visually.
- Keep the lower lash line softly smudged rather than harsh to avoid overwhelming your eyes.
When I first tried this, I realized that blending above my fold prevents the shadow from disappearing. What if you adjusted your crease placement with shadow—could it open your eyes more?
Almond Eyes
Almond eyes are versatile and can pull off many smokey eye styles beautifully. To emphasize their natural shape, blend your shadow to follow the eye’s curve.
- Apply a medium shade on the lid and deepen the outer V for dimension.
- Blend well to avoid harsh lines and maintain the eye’s natural lift.
- Line both upper and lower lash lines for a balanced look.
I find that following the natural shape of almond eyes with my shadow makes the look effortless yet dramatic. How will you use your eye shape to enhance your smokey eye next time?
Common Mistakes To Avoid
Many makeup lovers struggle with smokey eyes because of common mistakes. These errors can ruin the look and make it less flattering. Avoid these pitfalls for a smooth, professional finish.
Overapplying Product
Too much eyeshadow can make the look heavy and messy. It is better to build color slowly. Start with a small amount and add more if needed. This approach helps keep control and prevents fallout.
Ignoring Blending
Harsh lines ruin the smokey effect. Blending is key to soft transitions between colors. Use a clean brush to blend edges carefully. Take your time to create a seamless gradient that looks natural.
Skipping Primer
Primer helps eyeshadow stay put longer and look vibrant. Without it, shadows may crease or fade quickly. Apply a thin layer of primer before eyeshadow for better grip and smooth application.

Credit: lipstickqueen.com
Frequently Asked Questions
What Are The Essential Products For Smokey Eye Makeup?
You need eyeshadow palette with dark and neutral shades, eyeliner, mascara, and an eyeshadow brush. Primer helps the makeup last longer. These basics create a perfect smokey eye look.
How Do I Choose The Right Colors For Smokey Eyes?
Select colors that complement your eye color and skin tone. Neutral browns suit most, while smoky greys and blacks create dramatic looks. Experiment with jewel tones for a unique twist.
Can Beginners Easily Master Smokey Eye Makeup?
Yes, beginners can master it with practice and the right technique. Start with lighter shades, blend well, and gradually add darker colors. Watching tutorials helps build confidence.
How To Make Smokey Eyes Last All Day?
Use an eyeshadow primer before applying makeup to prevent creasing. Set the look with a translucent powder and use waterproof eyeliner and mascara for durability.
Conclusion
Creating a smokey eye look is easier with practice. Start with soft shades and blend well. Gradually darken with deeper colors. Use a pencil or gel liner for definition. Smudge lightly for a natural finish. Don’t forget mascara for volume.
Experiment with different colors for variety. Practice makes perfect. Soon, you’ll achieve the desired effect effortlessly. Enjoy the transformation and confidence it brings. Remember, makeup is an art. Your face is the canvas. Have fun, and let your creativity shine.
