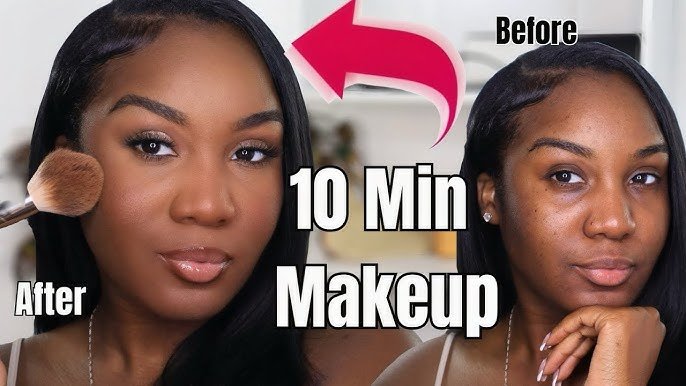
Are you tired of feeling overwhelmed every time you open your makeup bag? Do you wish you could effortlessly apply makeup and enhance your natural beauty?
You’re not alone. Many people feel the same way, but the good news is that learning how to apply makeup doesn’t have to be complicated or intimidating. In fact, with the right guidance, it can be simple and even fun.
Imagine walking out the door each morning with confidence, knowing you look your best. This isn’t just a dream; it’s totally achievable. By understanding a few basic techniques, you can transform your daily routine and look fabulous with minimal effort. Your makeup journey starts here, and by the end of this article, you’ll have the tools you need to create stunning looks that suit your style and personality. So, are you ready to discover the secrets to flawless makeup application? Let’s dive in and unlock your beauty potential!

Credit: www.shryoan.com
Preparing Your Skin
Preparing your skin is the foundation of flawless makeup. Without a clean, hydrated, and smooth canvas, even the best products can look patchy or uneven. Taking a few minutes to care for your skin before makeup sets you up for success and helps your look last longer.
Cleansing And Moisturizing
Start by cleansing your face to remove dirt, oil, and any leftover products. This step refreshes your skin and prevents clogged pores. Use a gentle cleanser that suits your skin type—whether it’s foaming for oily skin or cream-based for dry skin.
After cleansing, apply a moisturizer to lock in hydration. This keeps your skin soft and prevents makeup from settling into dry patches. If you have oily skin, choose a lightweight, oil-free moisturizer to avoid extra shine.
Have you ever noticed how makeup looks uneven on dry skin? That’s why moisturizing isn’t optional—it’s essential. Even if your skin feels oily, a bit of hydration balances your skin’s natural oils and improves texture.
Priming For Smooth Application
Primer acts like a base coat for your makeup. It smooths out your skin’s surface, blurs imperfections, and helps foundation and other products glide on easily. Using primer can make a noticeable difference in how your makeup wears throughout the day.
Choose a primer based on your skin needs. For example, mattifying primers work well if you struggle with shine, while hydrating primers boost moisture for dry skin. I once skipped primer before an event and saw my foundation fade quickly—since then, I never skip this step.
Think about what you want your makeup to achieve. Do you need extra staying power? Or a glow that lasts? Selecting the right primer can give you that edge and make your makeup application much smoother.

Credit: imabeautygeek.com
Choosing The Right Products
Choosing the right makeup products sets the foundation for a flawless look. It’s not just about picking what’s popular but what truly suits your skin type, tone, and personal style. The right choices can enhance your natural beauty and make your application process smoother and more enjoyable.
Selecting Foundation And Concealer
Start by identifying your skin type—oily, dry, combination, or sensitive. This helps you choose a foundation that feels comfortable throughout the day. For instance, matte foundations work well for oily skin, while hydrating formulas suit dry skin better.
Matching your foundation shade to your neck or jawline ensures a natural look. Don’t test it on your wrist or hand, as those areas can differ in tone. If possible, get samples or test in natural light to avoid surprises.
Concealer should be one or two shades lighter than your foundation to brighten areas like under your eyes. If you struggle with redness or blemishes, a color-correcting concealer in peach or green can work wonders before applying your regular concealer.
Picking Suitable Eye And Lip Colors
Choose eye colors that make your eye color pop. Brown eyes can look stunning with bronze or navy shades, while blue eyes often glow with warm oranges or copper tones. Your eyeshadow doesn’t need to be bold; sometimes a soft neutral shade can highlight your eyes beautifully.
For lips, consider both your skin tone and the occasion. Neutral tones like soft pinks or nude shades work well for everyday wear. If you want to make a statement, reds and berries add instant drama and confidence.
Don’t forget to test lip colors on your lips, not just the back of your hand. Lipstick can look very different once applied because of your natural lip color and texture. Have you ever bought a shade that looked perfect in the store but not on you? Testing helps avoid that frustration.
Applying Base Makeup
Applying base makeup creates a smooth canvas for the entire look. It evens out skin tone and hides imperfections. Proper base application makes your makeup last longer and look natural. Focus on each step carefully for the best results.
Foundation Techniques
Choose a foundation that matches your skin tone perfectly. Use a small amount to avoid a heavy look. Apply foundation in dots on your forehead, cheeks, nose, and chin. Blend it outward using a makeup sponge or brush. Use gentle tapping motions to blend for a natural finish. Build coverage gradually if needed.
Blending Concealer Flawlessly
Select a concealer one or two shades lighter than your foundation. Apply it on dark circles, blemishes, or redness. Use your ring finger or a small brush to gently tap the concealer. Blend the edges well to avoid harsh lines. Avoid rubbing; tapping helps maintain coverage and smoothness.
Setting With Powder
Pick a translucent or skin-toned powder to set your base. Use a fluffy brush or powder puff to apply. Lightly press the powder on areas that get oily, like the T-zone. Avoid applying too much powder to keep skin from looking dry. Setting powder helps control shine and keeps makeup in place.

Credit: www.youtube.com
Enhancing Your Eyes
Enhancing your eyes can transform your entire look. Eyes draw attention and express emotions. Proper makeup highlights their natural beauty and adds depth. Simple techniques can make eyes appear larger, brighter, and more defined.
Shaping And Filling Eyebrows
Eyebrows frame the eyes and balance the face. Use a brow pencil or powder close to your natural hair color. Follow your natural brow shape for the best result. Fill in sparse areas with light, feathery strokes. Brush brows with a spoolie to blend the product evenly. Avoid harsh lines to keep a natural look.
Eyeshadow Application Tips
Choose colors that complement your eye color. Apply a light shade on the eyelid as a base. Use a medium shade on the crease to add depth. Blend well to avoid harsh edges. Highlight the brow bone and inner corner with a light shimmer. Use clean brushes for smooth blending.
Eyeliner Styles For Different Looks
Eyeliner changes the eye’s shape and size. A thin line close to the lash line looks natural. Winged eyeliner adds drama and lifts the eyes. Smudged eyeliner gives a soft, smoky effect. Use pencil for a gentle look and liquid for precision. Match eyeliner color with your eyeshadow for harmony.
Applying Mascara Effectively
- Start with clean lashes for better results.
- Wiggle the wand at the base of lashes.
- Pull the wand upward to the tips in a smooth motion.
- Apply multiple coats for volume but avoid clumps.
- Use a lash comb to separate lashes if needed.
- Apply mascara on both upper and lower lashes for balance.
Contouring And Highlighting
Contouring and highlighting can dramatically change the way your face looks, enhancing your natural features and adding dimension. These techniques create shadows and light on your skin, helping to define your cheekbones, jawline, and nose. If you want to learn how to make your makeup look professionally done without overdoing it, mastering these two steps is key.
Contouring Basics
Contouring is about using a shade slightly darker than your skin tone to create shadows. Start by identifying the areas you want to define, such as under your cheekbones, along your jawline, and the sides of your nose.
Use a matte contour powder or cream product. Apply with a small angled brush or makeup sponge for precision. Blend well to avoid harsh lines—your goal is subtle depth, not obvious streaks.
Ask yourself: which parts of your face would you like to bring forward, and which would you like to recede? This reflection can guide your contour placement effectively.
Using Highlighter For Glow
Highlighter brings light to the high points of your face, making skin look fresh and radiant. Apply it on the tops of your cheekbones, the bridge of your nose, the brow bones, and your cupid’s bow.
Choose a formula that suits your skin type—liquid or cream highlighters work well for dry skin, while powders are great for oily skin. Use a small brush or your fingertip to gently tap the product on without overdoing it.
Have you noticed how a little glow can brighten your entire complexion? A soft highlight can make your skin appear healthier and more awake instantly.
Adding Color To Your Cheeks
Adding color to your cheeks is a simple way to bring life and dimension to your face. It brightens your complexion and can make you look more awake and healthy. Knowing how to choose and apply blush properly can change the entire effect of your makeup.
Choosing The Right Blush
Pick a blush shade that complements your skin tone. If your skin is fair, soft pinks or peaches work well. Medium skin tones look great with berry or warm apricot shades, while deeper skin tones shine with rich plums or vibrant tangerines.
Think about the finish too. Matte blushes give a natural look, while shimmer blushes add a bit of glow. Have you noticed how some blushes can make your skin look dry? Testing the texture on your wrist before buying helps avoid that.
Blush Application Techniques
Start with a light hand—it’s easier to add more than to remove excess. Smile gently to find the apples of your cheeks, then use a fluffy brush to apply color there. Blend the blush outward toward your temples to avoid harsh lines.
If you want a subtle look, tap the blush onto the skin and blend softly. For a more defined effect, layer the color gradually. Ever tried using your fingers instead of a brush? It can warm up the product and help it melt into your skin.
- Use circular motions for a natural flush.
- Apply blush after foundation and before setting powder.
- Check your makeup in natural light to ensure the color looks balanced.
Have you noticed how the right blush can instantly lift your mood and confidence? Experiment with different shades and techniques to find what makes you feel your best.
Finishing With Lips
Finishing with lips completes your makeup look with style and precision. Well-defined lips enhance your smile and boost your confidence. The right lip products bring balance and harmony to your face. Focus on shaping and coloring your lips carefully for a polished finish.
Lip Liner Tips
Choose a lip liner close to your natural lip color or lipstick shade. Sharpen the pencil for precise lines. Start lining from the center of your upper lip, following your natural shape. Outline the bottom lip gently, connecting the corners smoothly. Avoid pressing too hard to prevent harsh lines. Use small strokes for a neat finish.
Applying Lipstick And Gloss
Apply lipstick starting from the center of your lips, moving outward. Use a lip brush for better control and even coverage. Blot your lips with a tissue to remove excess product. Add a second layer for longer-lasting color. For a shiny look, apply a thin layer of lip gloss on top. Focus gloss on the center to make lips appear fuller.
Setting Your Makeup
Setting your makeup is the final step to keep your look fresh and flawless. It locks in all the hard work and prevents smudging or fading. Proper setting helps makeup last through heat, sweat, and long days. This step can make a big difference in how your makeup looks after hours.
Using Setting Spray
Setting spray acts like a shield over your makeup. Hold the bottle about 8 inches from your face. Spray in a gentle, sweeping motion. Let it dry naturally without touching your face. This spray helps blend layers and keeps makeup from melting away. Choose a spray that suits your skin type, like hydrating or mattifying formulas.
Touch-up Tips For Longevity
- Carry blotting papers to remove excess oil without ruining makeup.
- Use a small amount of powder on shiny areas for a quick refresh.
- Keep a mini setting spray for quick spritzes throughout the day.
- Apply lipstick with a brush for longer-lasting color.
- Reapply concealer or foundation lightly on areas that fade.
Common Makeup Mistakes To Avoid
Applying makeup can transform your look, but small mistakes often hold back your efforts. Avoiding common errors can save you time and frustration. Let’s look at some frequent makeup pitfalls and how you can steer clear of them.
Using The Wrong Foundation Shade
Choosing a foundation that doesn’t match your skin tone is a classic mistake. Many pick a shade that looks good in the store but doesn’t blend well in natural light. Test foundation on your jawline, not your hand, and check it in daylight before buying.
Have you ever left the house only to realize your face looks too light or too dark compared to your neck? That’s a sign you need to reassess your shade choice.
Applying Too Much Product
It’s tempting to pile on makeup, especially when aiming for full coverage. However, too much foundation, concealer, or powder can make your face look cakey and unnatural. Start with a small amount and build gradually.
Think about how your skin feels by the end of the day. If it feels heavy or looks cracked, you’ve likely used too much product.
Skipping Primer Or Moisturizer
Primer and moisturizer prepare your skin for makeup and help it last longer. Skipping these steps can cause uneven application and patchiness. Apply moisturizer first, then wait a few minutes before adding primer and foundation.
Do you notice your makeup fading quickly or settling into fine lines? Adding these simple steps can fix that.
Overlooking Blending
Blending is key to a polished look. Harsh lines around your eyes, lips, or foundation edges make makeup obvious and less flattering. Use clean brushes or sponges to blend edges softly into your skin.
Ask yourself: Can you see where your makeup starts and ends? If yes, spend more time blending.
Ignoring Your Natural Features
Makeup should enhance your unique features, not hide them. Avoid following trends blindly if they don’t suit your face shape or skin type. Customize your look by focusing on what makes you feel confident.
Have you tried to copy a look that just didn’t feel right? That’s a clue to adapt techniques that work better for you.
Tools For A Professional Finish
Using the right tools can make a huge difference in how your makeup looks at the end of the day. A professional finish doesn’t just come from the products you choose but also from how you apply them. The right brushes and sponges help you blend seamlessly and achieve a flawless appearance that lasts.
Essential Brushes And Sponges
Having a few good brushes and sponges is key. You don’t need every brush in the store, but some basics will elevate your routine. A foundation brush or a dense sponge can help you apply liquid foundation evenly without streaks.
A fluffy powder brush is perfect for setting your makeup with powder without making it cakey. A small angled brush works wonders for defining your brows or applying precise eyeliner. For eyeshadow, a flat shader brush and a blending brush are must-haves to create depth and smooth transitions.
- Flat foundation brush:For smooth, streak-free base.
- Beauty sponge:For a natural, airbrushed look.
- Powder brush:For light, even powder application.
- Angled brush:For brows and eyeliner precision.
- Eyeshadow brushes:For detailed eye makeup.
Cleaning Your Makeup Tools
Dirty brushes and sponges can cause breakouts and uneven makeup. Cleaning them regularly keeps your skin healthy and your makeup looking fresh. I learned this the hard way when my skin broke out after skipping brush cleaning for weeks.
Use a gentle brush cleanser or mild soap to wash your tools. Rinse thoroughly and let them dry completely before the next use. Try to clean your brushes at least once a week if you use makeup daily, and sponges after every use to avoid bacteria buildup.
Have you noticed a difference in your makeup’s finish when your tools are clean? It’s often the small habits that make the biggest impact on your look and skin health.
Frequently Asked Questions
What Are The Basic Steps To Apply Makeup?
Start with a clean face and moisturizer. Apply primer, foundation, and concealer. Use eyeshadow, eyeliner, and mascara next. Finish with blush, lipstick, and setting spray for long-lasting makeup.
How Do I Choose The Right Foundation Shade?
Match foundation to your neck or jawline in natural light. Test several shades on your skin. Choose one that blends seamlessly and complements your skin tone.
What Is The Best Way To Apply Eyeshadow?
Use an eyeshadow primer for longevity. Apply a base shade all over the lid. Add a darker shade to the crease for depth. Blend well to avoid harsh lines.
How Can I Make My Makeup Last Longer?
Use a primer before foundation. Set makeup with a translucent powder. Finish with a setting spray. Avoid touching your face throughout the day.
Conclusion
Applying makeup can be simple and fun with practice. Start with clean skin and use the right tools. Choose colors that suit your style and skin tone. Take your time to blend and build layers softly. Remember, makeup enhances your natural beauty, not hides it.
Enjoy the process and try new looks. Each step helps you feel more confident and creative. Keep practicing, and makeup will become easier every day.
