If you’ve ever wanted to transform into a spine-chilling zombie for Halloween or a themed event, you’ve come to the right place. Creating an impressive zombie look doesn’t have to be complicated or expensive.
In fact, with a few easy tips and tricks, you can achieve a terrifyingly realistic appearance that will have everyone doing a double take. Imagine the thrill of seeing your friends’ jaws drop in awe of your undead transformation. Whether you’re a beginner or just looking for some fresh ideas, these simple zombie makeup tips are designed just for you.
Get ready to unleash your creativity and bring your zombie character to life in ways you never thought possible. Dive in and discover how you can easily become the star of any spooky gathering!
Credit: www.lemon8-app.com
Basic Zombie Makeup Supplies
Getting your zombie look right starts with gathering the basic supplies. These items set the stage for your undead transformation. Without the right tools and colors, your makeup won’t have that convincing creepy edge.
Essential Tools And Products
Start with a good foundation. Use a pale face paint or foundation to create that ghostly, lifeless skin tone. It’s amazing how much this simple base changes your whole appearance.
Next, grab some fake blood. It adds instant gore and realism. Look for a non-sticky formula that dries with a wet look for the best effect.
Don’t forget makeup sponges and brushes. They help you apply and blend colors smoothly. I learned the hard way that fingers just don’t give the same control or texture.
Other useful items include:
- Liquid latex for creating wounds and peeling skin effects
- Dark eyeshadows for sunken eyes and hollow cheeks
- Gel or cream makeup for texture and depth
- Setting spray to keep everything in place
Choosing The Right Colors
Your color palette determines how realistic or stylized your zombie looks. Stick to muted, earthy tones like greys, greens, and browns to mimic decay and dirt.
Use dark reds and purples to create bruises and blood clots. These shades bring out the gruesome details without overpowering the base.
Adding a touch of yellow or green can make your skin appear sickly and rotting. I once skipped this step and realized my zombie looked more like a tired person than a corpse.
Remember, layering colors works better than slapping on one solid shade. Build up your palette gradually to achieve the most convincing undead effect.
Preparing Your Skin
Preparing your skin is the first step to great zombie makeup. It helps the makeup stay longer and look better. Clean and smooth skin makes the base layer go on evenly. This step protects your skin from harsh makeup products too.
Cleaning And Moisturizing
Start by washing your face with a gentle cleanser. This removes dirt, oil, and sweat. Use lukewarm water to keep your skin calm. After washing, pat your skin dry with a soft towel.
Next, apply a light moisturizer. It keeps your skin hydrated under the makeup. Choose a moisturizer that suits your skin type. Let it absorb fully before moving to the next step.
Applying A Base Layer
Use a primer or a light foundation as the base layer. This creates a smooth surface for zombie makeup. It also helps the colors stick better and last longer.
Apply the base layer evenly across your face. Focus on areas where makeup tends to fade, like the nose and cheeks. Use a sponge or your fingers to blend it well.
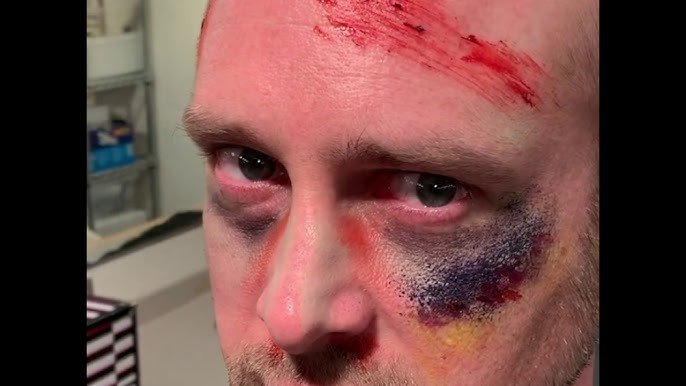
Creating Wounds And Scars
Creating wounds and scars is key to making your zombie makeup truly convincing. These details add depth and realism to your look, making you stand out at any Halloween party or cosplay event. Getting the texture and color right can make your zombie face look like it just crawled out of a horror movie.
Using Liquid Latex
Liquid latex is a game changer for realistic wounds. You can apply it directly to your skin in thin layers to build texture. Once dry, gently peel or tear parts to mimic torn flesh or open cuts.
Adding tissue paper over the latex gives extra depth. Dab more latex over the tissue to seal it and create raised scars or wounds. Be patient—letting each layer dry completely helps avoid smudging or cracking.
Have you tried blending liquid latex with your skin tone makeup? It helps the wounds blend seamlessly with your face, avoiding that fake, obvious look. Also, keep a remover or baby oil handy; it makes taking off the latex easier and prevents skin irritation.
Fake Blood Techniques
Nothing sells a zombie look like realistic fake blood. You can use store-bought blood or make your own with corn syrup and red food coloring. Thicken it with a little cocoa powder for a darker, coagulated effect.
Apply blood around the wounds with a sponge or brush. Try dabbing for fresh cuts and flicking for splatters. For dripping blood, tilt your head back slightly and let the blood run naturally—it looks way more authentic than painting it on.
Have you considered layering blood colors? Using a mix of bright red with darker maroon adds depth and avoids the “plastic” blood look. Remember, less is often more—too much blood can look fake and messy instead of scary.
Achieving Pale, Decayed Skin
Achieving pale, decayed skin is key to making your zombie makeup look truly convincing. The goal is to replicate that eerie, lifeless tone while adding subtle depth to mimic skin that’s seen better days. You want your skin to look cold, drained, and a bit rough, but not flat or one-dimensional.
Think about how your skin looks on a cold winter morning—pale with a touch of unevenness. That’s the effect to aim for. Have you ever noticed how shadows and texture make a face look more realistic? That’s exactly what you need to create with your makeup.
Layering Foundation And Powder
Start with a foundation that’s several shades lighter than your natural skin tone. Apply it evenly to create that ghostly base. Don’t worry if it looks a bit unnatural at first—that’s the point!
Next, add a light dusting of translucent powder. This helps set the foundation and gives a matte finish, which makes your skin appear dry and lifeless. Try layering the foundation and powder in thin amounts rather than one thick layer. This builds a realistic pale effect without cracking.
One trick I learned is to mix a tiny bit of grey or green face paint into your foundation. It adds an undertone of decay that pure white can’t achieve. Have you tried mixing colors in your makeup base before? It can really change the final look.
Adding Texture With Sponges
Texture brings your zombie skin to life—or rather, to death. Use a stippling sponge or a regular makeup sponge to dab irregular patterns onto your face. This creates the illusion of rough, damaged skin.
Lightly press the sponge dipped in darker shades like greys, greens, or browns over your pale base. Don’t cover the entire face; focus on areas where decay naturally appears—cheeks, temples, and around the mouth. This random spotting mimics bruising and rotting patches.
Another tip is to use the sponge dry for a more scattered effect or slightly damp for denser texture. Experiment to see what looks best on your skin. Have you ever played with different sponge techniques to create special effects? It’s a simple tool that makes a big difference.
Enhancing Eyes And Mouth
The eyes and mouth are the most expressive parts of your face, making them key areas to focus on for your zombie makeup. Enhancing these features can bring your undead look to life—or death—with just a few simple tricks. Let’s dive into how you can create dark, sunken eyes and a distressed, creepy mouth that will leave everyone staring.
Dark Circles And Hollow Effects
Dark circles under the eyes create a tired, haunting look that’s perfect for zombies. Use a matte dark brown or grey eyeshadow to gently shade around your eyes. Focus on the lower lids and blend outward to create a natural sunken effect.
Adding a touch of purple or blue eyeshadow can mimic bruising and make the hollow look more realistic. Try using a small brush to apply the colors precisely, then blend with your finger for a softer edge. Don’t forget to highlight the inner corners with a lighter shade to make your eyes pop eerily.
Have you noticed how real zombies don’t have bright, lively eyes? Mimicking that effect with shadow can make your makeup stand out. Keep the area under your eyebrows lighter to contrast with the dark circles, enhancing the sunken appearance.
Distressing The Lips
To create a mouth that looks like it’s been through a lot, start with a base of pale or muted lipstick. Avoid anything too bright or glossy. Instead, choose deep reds, browns, or even black to give a decayed or dried blood effect.
Next, use a small brush or your fingertip to smudge the edges of your lips. This breaks up the clean line and makes the lips look cracked or worn. Adding a little bit of fake blood or red eyeshadow at the corners can simulate wounds or dried blood for extra impact.
Consider gently peeling or cracking the lipstick with tissue or powder to create texture. This small detail can make your lips appear parched or damaged. How can you make your zombie mouth even more convincing? Try combining these techniques with subtle fake scabs or scars around the lips.
Hair Styling For A Zombie Look
Hair styling plays a key role in creating a convincing zombie look. Untidy, rough hair adds to the undead appearance. The goal is to make hair look lifeless and neglected. Simple tricks can turn normal hair into a creepy style.
Messy And Tattered Styles
Start by teasing the hair with a comb or fingers. This creates volume and a wild effect. Use hairspray to hold the messy shape. Avoid neat parts or smooth finishes. Split ends or uneven cuts add to the ragged look.
- Use fingers to tousle hair randomly.
- Pull small sections out for a torn effect.
- Apply dry shampoo to add rough texture.
- Backcomb the roots for extra volume.
These simple steps create a messy, disheveled style that looks like a zombie’s hair. The key is to look unkempt and rough.
Adding Dirt And Grime
Dirt and grime make hair appear dirty and neglected. Use brown or gray eyeshadow to dust the roots and strands. Rub it gently with fingers for a natural effect. Cornstarch or baby powder can add a dusty look.
- Apply powder sparingly to avoid a fake look.
- Use a small brush to spread color evenly.
- Focus on the scalp and lower parts of hair.
- Mix dark eyeshadow with powder for depth.
This simple trick adds realism to the zombie hairstyle. Dirty, dusty hair completes the undead transformation.
Quick Fixes And Time-saving Tips
When you’re short on time but still want to create a convincing zombie look, quick fixes and time-saving tips become your best friends. The goal is to get a spooky effect without spending hours in front of the mirror. With the right tricks, you can still wow your friends and feel great about your makeup, even if you’re rushing.
Using Ready-made Prosthetics
Ready-made prosthetics are a game changer for quick zombie makeup. These pieces come pre-designed with scars, wounds, or rotting flesh details, so you don’t have to sculpt anything yourself. Just apply them with skin-safe adhesive, blend the edges with some makeup, and add a bit of fake blood or dirt.
They save you tons of time and make your zombie look more realistic. Have you ever felt stuck trying to create a wound from scratch? Using prosthetics can lift that weight off your shoulders instantly.
Simplifying Complex Designs
Complex zombie designs can be intimidating, especially if you’re in a hurry. Instead of trying to replicate every detail, focus on a few key features like hollow eyes, pale skin, and cracked lips. Use basic makeup tools like sponges and brushes to create texture quickly.
Try using just two or three colors to add depth without overcomplicating things. For example, a gray base with touches of dark purple and red can mimic bruising and decay. Simplifying your look doesn’t mean it’s less scary—it means you’re working smarter.
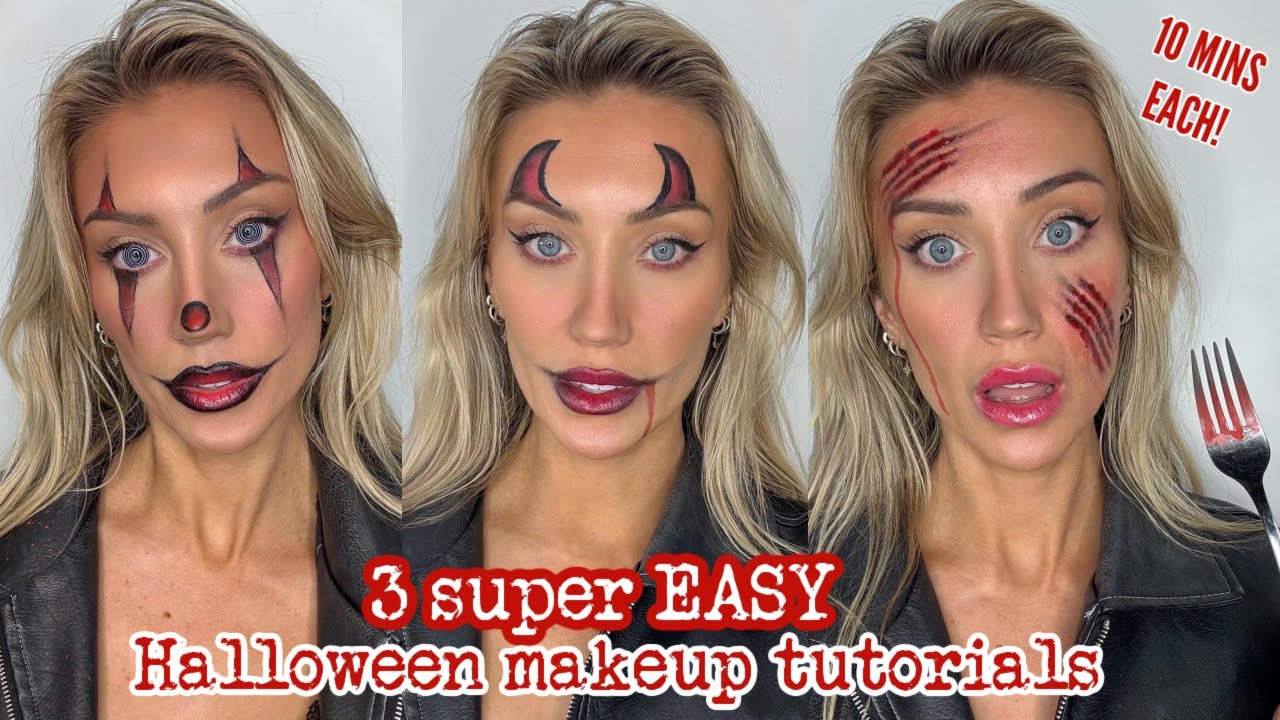
Credit: www.youtube.com
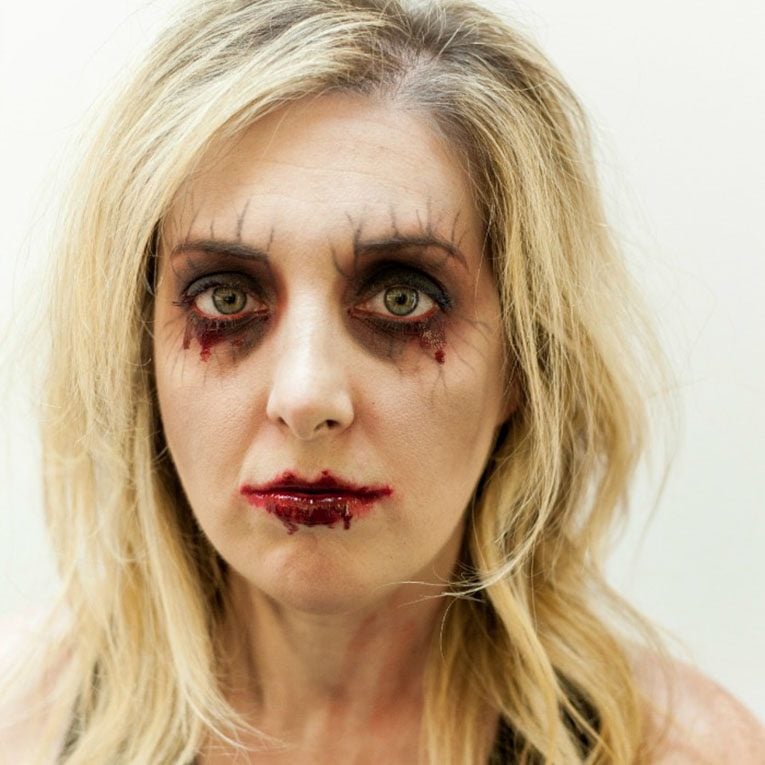
Credit: www.rd.com
Frequently Asked Questions
What Are The Basic Supplies For Easy Zombie Makeup?
Basic supplies include face paint, fake blood, liquid latex, sponges, and brushes. These tools help create realistic wounds and decayed skin effects quickly. Using affordable, easy-to-use items can simplify your zombie makeup process.
How Can I Create Realistic Wounds For Zombie Makeup?
Use liquid latex and tissue to build texture on your skin. Add dark face paint and fake blood for a fresh wound look. This method gives depth and authenticity without needing professional skills.
What Colors Work Best For Zombie Makeup?
Use greens, grays, purples, and blacks for decayed skin tones. These colors mimic bruises and rotting flesh effectively. Adding red fake blood enhances the gory, undead appearance.
How Do I Apply Zombie Makeup For Beginners?
Start with a clean, dry face. Apply base colors with a sponge, then add details like wounds and shadows with brushes. Practice layering colors for a more natural zombie look.
Conclusion
Zombie makeup can be simple and fun for everyone. These easy tips help you create a spooky look quickly. Use basic materials you have at home. Practice a little, and you will see great results. No need to buy expensive products or tools.
Try different styles to find what suits you best. Enjoy the process and be creative. Your scary zombie face will impress friends and family. Ready to bring the dead to life? Now, go ahead and start your zombie makeup adventure!
