Are you ready to discover the secret to creating your own makeup? Imagine having the power to craft products tailored just for your skin and style.
Making your own makeup is easier than you think, and it lets you control exactly what goes onto your face. In this guide, you’ll learn simple steps to mix natural ingredients into beautiful, safe cosmetics. Keep reading, and you’ll unlock tips that can transform your beauty routine—and save you money too!

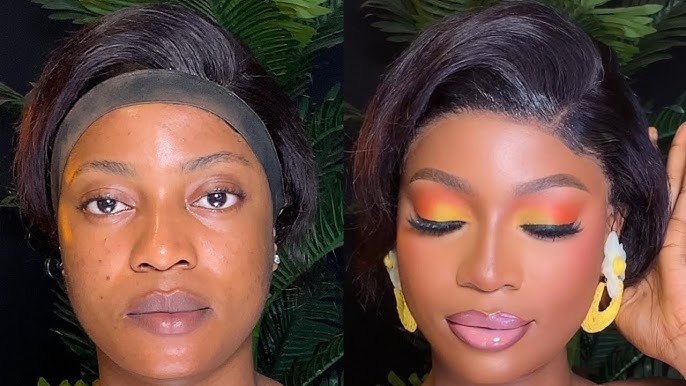
Credit: www.youtube.com
Choosing Ingredients
Choosing the right ingredients is the foundation of making your own makeup. The quality and type of ingredients affect not only the final look but also how your skin reacts. Understanding your options can help you create products that are both beautiful and safe.
Natural Vs Synthetic Options
Natural ingredients come from plants, minerals, and other organic sources. They often feel gentler on the skin and can offer added benefits like nourishment. However, natural ingredients sometimes have a shorter shelf life and can vary in color or texture.
Synthetic ingredients, on the other hand, are man-made and offer consistency. They often last longer and provide vibrant colors or smooth textures. But they can irritate sensitive skin or cause allergic reactions in some people.
Ask yourself: Do you prefer the purity of nature, or the reliability of lab-made components? Your choice will shape the makeup you create.
Skin-safe Components
Safety should be your top priority. Look for ingredients labeled as non-comedogenic, hypoallergenic, and dermatologist-tested. These terms suggest the ingredient is less likely to clog pores or cause irritation.
Some common skin-safe ingredients include jojoba oil, shea butter, and zinc oxide. Avoid harsh chemicals like parabens, sulfates, and synthetic fragrances that can damage your skin over time.
Test small batches on your skin before full use. This simple step can save you from irritation and disappointment.
Sourcing Quality Materials
Where you buy your ingredients matters. High-quality suppliers often provide detailed information about sourcing and purity. Organic certifications or third-party testing can add trust.
Buy from reputable stores or online shops specializing in cosmetic ingredients. Check customer reviews and ingredient lists carefully.
Consider sustainability too. Ingredients sourced responsibly can make your makeup kinder to the environment and your conscience.
Essential Tools
Creating your own makeup requires certain tools to ensure quality and safety. Having the right equipment makes the process easier and more enjoyable. Essential tools help you measure, mix, and store your products properly. These tools also keep your workspace clean and your makeup safe to use.
Basic Equipment List
- Measuring spoons and cups for accurate ingredient amounts
- Mixing bowls made of glass or stainless steel
- Spatulas and stirring sticks to blend ingredients smoothly
- Double boiler or heat-safe container for melting waxes and oils
- Precision scales for weighing small amounts of powders and liquids
- Dropper bottles for adding liquids in small drops
- Small funnels to pour liquids without spills
Sterilization Tips
Keep all tools clean to avoid contamination. Wash items with hot, soapy water after each use. Rinse thoroughly and dry with a clean towel.
Use rubbing alcohol to sanitize tools before starting a new batch. Avoid sharing tools between different products to prevent mixing bacteria. Sterilizing ensures your makeup stays fresh and safe for skin.
Storage Containers
Choose containers that close tightly to protect makeup from air and dust. Glass jars and metal tins work well for creams and balms. Small plastic containers can hold powders and loose pigments.
Label each container with the product name and date made. Store containers in a cool, dry place away from sunlight. Proper storage helps maintain the quality and shelf life of your makeup.
Creating Base Products
Creating base products is the foundation of any makeup routine. These products even out your skin tone and prepare your face for other makeup layers. Making your own base products lets you control the ingredients and customize shades to suit your skin perfectly.
Diy Foundation Recipes
Crafting your own foundation is simpler than you might think. Start with a natural base like aloe vera gel or shea butter to create a smooth texture.
Add pigments such as cocoa powder, cinnamon, or turmeric to match your skin tone. Adjust the amount bit by bit until you find the perfect shade. You can also mix in a few drops of jojoba or almond oil to keep your skin hydrated throughout the day.
Have you ever struggled to find a foundation that doesn’t irritate your skin? Making your own can solve that problem by avoiding harsh chemicals and fragrances.
Making Concealers
Concealers hide imperfections and brighten specific areas on your face. To make a concealer, blend arrowroot powder or cornstarch with a bit of your DIY foundation base.
Add a small amount of beeswax for thickness and coconut oil for moisture. This mix gives you a creamy consistency that’s easy to apply and blends well with your skin.
Test your homemade concealer on spots or under your eyes to see how it performs in different lighting. Does it cover without looking cakey? Adjust the pigment and texture as needed to get flawless coverage.
Tinted Moisturizers
Tinted moisturizers offer a light, natural look while keeping your skin nourished. Combine your favorite moisturizer with a small quantity of your DIY foundation base to create a tinted moisturizer.
This mix gives you hydration and a subtle tint, perfect for days when you want minimal makeup. You can add a drop of vitamin E oil for extra skin benefits and a smoother finish.
Are you ready to skip heavy makeup but still want a polished look? A tinted moisturizer you make at home can be the answer.
Color Cosmetics
Color cosmetics bring life and vibrancy to makeup. They highlight facial features with shades and hues. These products add personality and style to any look. Crafting your own color cosmetics allows control over ingredients and colors. It also lets you customize textures and finishes for your skin type.
Lipsticks And Tints
Lipsticks and tints add color and moisture to lips. To make them, start with a base of natural oils and waxes. Beeswax or candelilla wax works well for firmness. Oils like coconut or jojoba add smoothness and hydration. Add natural pigments such as beetroot powder or mica for color. Mix thoroughly and pour into small containers or tubes. Let cool before use. Adjust color by adding more pigment or blending shades.
Blushes And Bronzers
Blushes and bronzers add warmth and dimension to the face. Begin with a fine powder base like cornstarch or arrowroot powder. Add natural colorants like cocoa powder for bronzers and hibiscus powder for blush. Mix in a small amount of arrowroot to soften the pigment. Use a sifter to ensure smooth texture. Test color on skin and tweak as needed. Store in airtight containers to keep fresh and dry.
Eyeshadows And Liners
Eyeshadows and liners define and enhance the eyes. For eyeshadows, use mica powders or natural clay for color. Blend different shades for depth and effect. For liners, create a paste using activated charcoal or cocoa powder with aloe vera gel. Adjust thickness for easy application. Package in small pots or pencils. Ensure ingredients are safe for use around eyes. Test for smoothness and color intensity.
Mixing And Matching Shades
Mixing and matching shades is key to creating unique makeup looks. It allows you to blend colors for a perfect fit. Understanding the basics helps you combine tones effectively. Testing the shades on your skin shows how they will really look. This process brings creativity and personalization to your makeup routine.
Color Theory Basics
Color theory explains how colors relate. Primary colors: red, blue, yellow. Secondary colors form by mixing two primary colors. Complementary colors sit opposite on the color wheel. These pairs create contrast and make colors pop.
Use color theory to find shades that blend well. Warm tones include reds, oranges, and yellows. Cool tones include blues, greens, and purples. Matching undertones keeps your look balanced and natural.
Customizing Tones
Start with base colors you like. Mix small amounts to test new shades. Add white to lighten, black to darken. Use yellow or red to warm a shade. Blue or green cools down the tone.
Keep notes of your mixes for future use. This helps recreate your favorite shades easily. Mixing allows you to fix colors that do not suit you.
Testing On Skin
Always test your mixed shades on your skin. Try a small amount on your wrist or jawline. Skin tone affects how colors appear. Natural light shows true color better than artificial light.
Observe the color after it dries. Some shades look different when dry. Testing prevents surprises and ensures you like the final look.

Credit: www.youtube.com
Preserving Your Makeup
Preserving your makeup is key to keeping it safe and effective. Proper care stops bacteria and mold from growing. It also keeps the colors and textures fresh longer. Simple steps can extend your makeup’s life and protect your skin from infections.
Natural Preservatives
Natural preservatives help makeup last without harsh chemicals. Ingredients like vitamin E, rosemary extract, and grapefruit seed extract work well. These substances fight bacteria and keep oils from going bad. Adding them during makeup making improves safety and shelf life.
Shelf Life Guidelines
Each makeup product has a typical shelf life. Powders last longer than creams or liquids. Here is a quick guide:
| Product Type | Typical Shelf Life |
|---|---|
| Powder Makeup | 2 years |
| Creams and Liquids | 6 to 12 months |
| Lipsticks | 1 year |
Follow these guidelines to avoid using expired makeup.
Preventing Contamination
Keep your makeup clean to stop contamination. Use clean tools every time you apply makeup. Avoid touching products with dirty hands. Store makeup in a cool, dry place away from sunlight. Close containers tightly after use. These habits reduce germs and keep makeup safe.
Safety And Allergy Tips
Making your own makeup can be exciting and rewarding, but safety should always be your top priority. Your skin is delicate, and using the wrong ingredients or ignoring allergy risks can cause irritation or worse. Taking simple safety steps can protect your skin and ensure a pleasant experience every time you create your cosmetics.
Patch Testing
Before applying any homemade makeup to your face, test it on a small area of your skin. A common spot is the inside of your wrist or behind your ear. Apply a small amount and wait 24 to 48 hours to check for redness, itching, or swelling.
This quick test can save you from uncomfortable reactions later. Have you ever skipped a patch test and regretted it? It’s a small step that makes a big difference in avoiding irritation.
Avoiding Irritants
Choose ingredients known for their gentle properties, especially if you have sensitive skin. Avoid strong fragrances, harsh preservatives, and ingredients like alcohol that can dry out your skin.
Keep an eye out for common irritants like synthetic dyes and parabens. Instead, opt for natural oils, beeswax, and mineral-based pigments. Knowing what irritates your skin helps you pick safer alternatives.
Labeling Your Products
Always label your homemade makeup clearly. Include the date you made it and the list of ingredients. This helps you track freshness and avoid using expired products that might cause skin problems.
Labels also protect others who might use your makeup, especially if they have allergies. How often do you check your cosmetics’ expiration dates? Clear labeling encourages safer use and better organization.
Troubleshooting Common Issues
Troubleshooting common issues in makeup making helps improve your final product. Problems with texture, consistency, or color can occur. Fixing these issues ensures your makeup looks smooth and natural. Small adjustments make a big difference in quality.
Fixing Texture Problems
Texture problems can make makeup feel rough or uneven. To fix this, check if your ingredients are well blended. Use a gentle mixer or stir slowly to avoid air bubbles. If the texture is grainy, try adding a small amount of liquid oil or water. For too thick makeup, warm it slightly before mixing. This helps ingredients combine better and creates a smooth texture.
Adjusting Consistency
Consistency affects how makeup spreads and feels on the skin. Thin makeup may not cover well, while thick makeup can be hard to apply. Add small amounts of water or aloe vera gel to thin the product. For thicker makeup, add beeswax or a small amount of thick cream. Mix well after each addition. Test the consistency by applying a small amount on your skin.
Correcting Color Mistakes
Color mistakes happen easily in makeup making. If your makeup is too dark, add white pigment or a light base. For colors that are too light, add a small amount of pigment or natural colorant. Mix colors slowly to avoid overshooting the shade. Always test the color on your skin before finalizing. Adjust in small steps for the best result.
Enhancing Your Diy Routine
Enhancing your DIY makeup routine can transform simple creations into personalized beauty essentials. Small tweaks can elevate your products, making them not only look good but also feel and work better. Have you ever thought about what extra ingredients could boost your makeup’s performance and appeal?
Incorporating Essential Oils
Essential oils add more than just fragrance to your makeup. They can soothe skin, fight bacteria, and even help with oil control.
- Tea tree oil is great for acne-prone skin.
- Lavender oil calms irritation and adds a floral scent.
- Rosehip oil provides hydration and anti-aging benefits.
Be careful with the amount you add—just a few drops can go a long way. Have you tested how your skin reacts to essential oils before mixing them into your products?
Using Natural Fragrances
Natural fragrances create a pleasant experience without synthetic chemicals. Ingredients like vanilla bean, citrus zest, or dried herbs can add subtle scents that brighten your makeup.
- Vanilla extract adds warmth and sweetness.
- Orange peel powder offers a fresh, zesty aroma.
- Chamomile petals bring a mild, calming scent.
Try blending these with your base ingredients and note how the scent develops over time. What natural scents make you feel confident and ready for the day?
Adding Skincare Benefits
Why settle for makeup that only covers flaws when you can nourish your skin at the same time? Adding ingredients like aloe vera gel, vitamin E oil, or green tea extract can improve skin health with every application.
- Aloe vera soothes and hydrates sensitive skin.
- Vitamin E acts as an antioxidant and helps skin repair.
- Green tea extract reduces redness and protects against damage.
Including these in your DIY makeup products can make a visible difference. What skincare benefits do you want your makeup to deliver daily?

Credit: www.youtube.com
Frequently Asked Questions
What Are The Basic Steps To Make Makeup At Home?
Making makeup at home involves mixing natural ingredients like oils, powders, and pigments. Start with a clean base, blend ingredients smoothly, and test colors carefully for safety and skin compatibility.
Which Ingredients Are Safe For Diy Makeup?
Safe DIY makeup ingredients include coconut oil, shea butter, cocoa powder, and natural clays. Avoid harsh chemicals and always patch test to prevent allergic reactions or skin irritation.
How Can I Make Long-lasting Makeup Products?
To make long-lasting makeup, use natural fixatives like beeswax or arrowroot powder. These help products stay put and resist smudging or fading throughout the day.
Can Homemade Makeup Match Commercial Product Quality?
Homemade makeup can be effective but may lack the durability and variety of commercial products. Experiment with recipes for best results and customize for your skin type.
Conclusion
Crafting your own makeup is fun and rewarding. Simple ingredients can create beautiful results. Mixing colors and textures allows for personal expression. It’s a creative journey. Safe and natural products mean healthier skin. Experiment with different recipes to find your favorites.
Remember to enjoy the process. Each step teaches you something new. Share your creations with friends. Inspire others to try homemade makeup too. With practice, you’ll gain confidence. The perfect look is just a mix away. Happy creating!
