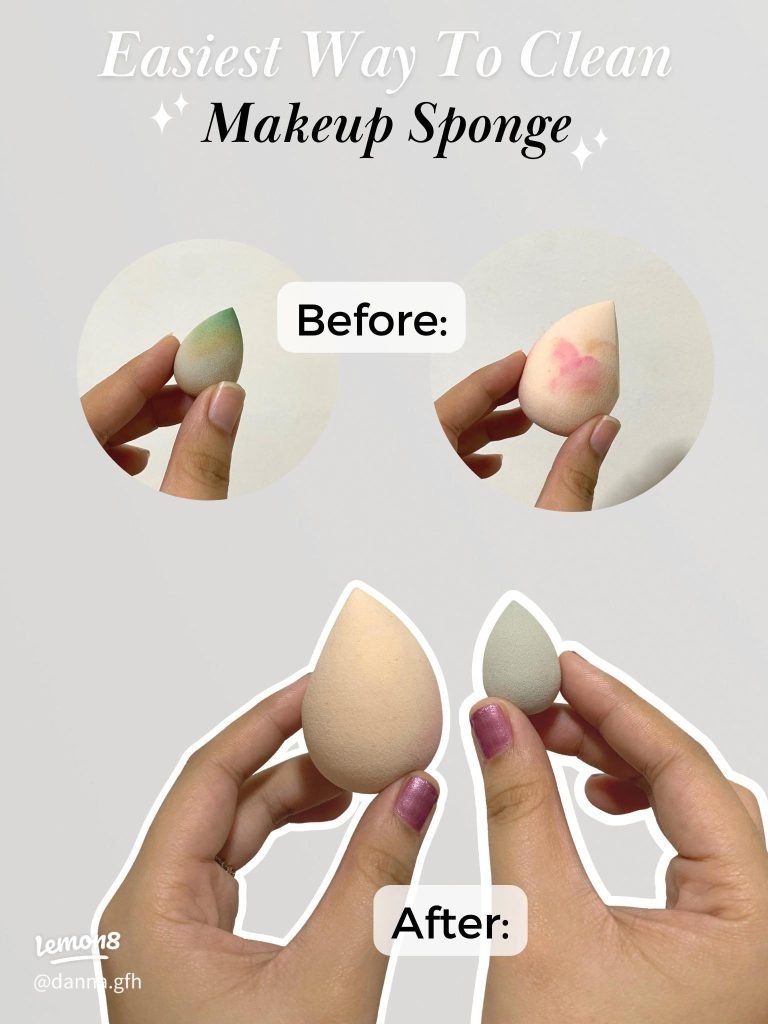
Your makeup sponge is one of the most important tools in your beauty routine. But if you’re not cleaning it properly, it can become a breeding ground for bacteria, causing breakouts and dull skin.
You might be surprised how simple and quick it is to keep your sponge fresh and spotless. You’ll discover easy, effective methods to clean your makeup sponge, so your skin stays healthy and your makeup looks flawless every time. Keep reading—you’ll never want to skip this step again!
Credit: salonperfect.com
Why Clean Makeup Sponges Matter
Keeping your makeup sponge clean is more than just a hygiene habit—it directly affects your skin’s health and the quality of your makeup look. Dirty sponges can harbor germs and oils that clog pores and cause breakouts. Understanding why cleaning your sponge matters can motivate you to make it a regular part of your beauty routine.
Bacteria And Skin Health
Makeup sponges are a perfect environment for bacteria to grow. Every time you use the sponge, it picks up oils, dead skin cells, and bacteria from your face. If you don’t clean it regularly, these bacteria multiply and can lead to skin irritation, redness, or acne.
Imagine applying foundation with a sponge filled with bacteria—it’s like putting dirt back on your face. This can worsen existing skin issues and even cause new ones. Keeping your sponge clean helps protect your skin and prevents unnecessary breakouts.
Impact On Makeup Application
A clean sponge makes a big difference in how your makeup looks. When your sponge is dirty, it can cause patchy or uneven foundation application. Old makeup residue and dirt can mix with fresh products, changing the color and texture.
Using a freshly cleaned sponge gives you a smooth, flawless finish. It allows your foundation to blend evenly without streaks or blotches. Have you noticed how your makeup looks better on days you use a clean sponge? That’s the real proof of its importance.
Tools You’ll Need
Cleaning your makeup sponge properly requires a few simple tools that you likely already have at home. Having the right supplies makes the process easier and more effective, ensuring your sponge stays fresh and lasts longer. Let’s look at the essentials you’ll need to get the job done right.
Gentle Cleansers
Choosing the right cleanser is crucial. Harsh soaps can damage your sponge, causing it to break down faster. Opt for gentle cleansers like mild baby shampoo, liquid castile soap, or specially formulated makeup sponge cleaners.
I once used a regular bar soap, and my sponge started to crumble within weeks. Switching to a gentle cleanser made a noticeable difference in its durability and cleanliness.
Warm Water
Warm water helps to loosen makeup and dirt trapped inside the sponge. Avoid hot water, as it can weaken the sponge’s material. Lukewarm water is just right to soften the sponge without causing damage.
Try squeezing the sponge under warm water before applying the cleanser. This simple step makes the cleaning process more effective and saves you effort.
Clean Towels
After rinsing your sponge, you need something to dry it off. Use a clean towel or microfiber cloth to gently press out excess water. Avoid rubbing vigorously to prevent tearing the sponge.
Having a dedicated towel for your makeup tools keeps everything hygienic. It also speeds up drying, so you can use your sponge again sooner.
Daily Cleaning Routine
Keeping your makeup sponge clean every day helps prevent bacteria buildup. It also keeps your skin healthy and your makeup fresh. A simple daily cleaning routine saves time and keeps your sponge ready for use. Two easy ways to clean your sponge daily include a quick rinse and a gentle soap wash.
Quick Rinse Method
Rinse your makeup sponge under warm water right after use. Squeeze it gently to release leftover makeup. Repeat this until the water runs clear. Avoid twisting or pulling the sponge to keep it intact. Let the sponge air dry in a clean area. This quick rinse helps remove surface makeup and dirt.
Using Soap Or Cleanser
Apply a small amount of mild soap or makeup cleanser to the damp sponge. Work the cleanser into the sponge with your fingers. Focus on areas with heavy makeup stains. Rinse the sponge under warm water while squeezing it. Repeat until the sponge looks clean and feels soft. Pat dry with a clean towel and let it air dry fully. This method cleans deeper and removes oils and bacteria.

Credit: www.amazon.com
Deep Cleaning Steps
Deep cleaning your makeup sponge is essential to keep it free from bacteria and buildup that can harm your skin. This process goes beyond a quick rinse, making sure every inch of the sponge is thoroughly cleaned. Here’s how you can do it effectively at home, ensuring your sponge stays fresh and ready for flawless makeup application.
Soaking Techniques
Start by soaking your makeup sponge in warm water mixed with a gentle cleanser. You can use a liquid soap or a specialized sponge cleaner. Let it sit for about 10 to 15 minutes to loosen all the makeup and oils trapped inside.
Adding a little bit of baking soda to the water can help break down stubborn stains. Have you ever noticed how some stains just won’t budge? Soaking allows the sponge to soften and release those particles, making the next steps easier.
Massaging And Rinsing
After soaking, gently massage the sponge with your fingers to work the cleanser deep into its pores. Avoid using harsh scrubbing motions as this can damage the delicate material. Focus on squeezing and releasing the sponge repeatedly to push out dirt and makeup residue.
Rinse under running water, continuing to squeeze until the water runs clear. You might need to repeat the process if your sponge is heavily stained. This part requires patience, but the result is a sponge that feels almost new.
Drying Properly
Once clean, squeeze out as much water as you can without twisting or pulling. Lay your sponge on a clean towel in a well-ventilated area to air dry. Avoid storing it in closed containers while damp, as this encourages mold growth.
Have you ever noticed a bad smell from your sponge? Proper drying is the key to preventing that. Letting it dry completely between uses keeps your sponge hygienic and extends its lifespan.
Tips To Extend Sponge Life
Keeping your makeup sponge clean is essential, but extending its life is just as important. A well-maintained sponge saves you money and ensures a flawless makeup application every time. Let’s dive into practical tips that help your sponge last longer without losing its softness or effectiveness.
Storage Best Practices
Where you keep your makeup sponge affects how long it stays fresh. Avoid storing it in a closed, damp container because moisture encourages bacteria growth.
Instead, let your sponge air dry completely on a clean surface. Use a breathable holder or a mesh pouch that allows airflow.
Try to keep your sponge away from direct sunlight and dust. I once left mine in a makeup bag without ventilation, and it quickly developed a strange odor. Don’t let this happen to you.
When To Replace Your Sponge
Knowing when to toss your sponge is crucial for skin health. If you notice tears, crumbling, or persistent staining, it’s time to get a new one.
Even with proper care, sponges should be replaced every 3 months. Using an old sponge can lead to clogged pores and breakouts.
Ask yourself: Does your sponge still feel soft and springy? If not, it’s signaling you to say goodbye.
Credit: www.lemon8-app.com
Alternative Cleaning Methods
Cleaning your makeup sponge regularly keeps it fresh and safe to use. Besides the usual washing with soap and water, some alternative ways make the process quick and effective. These methods help remove makeup residue and bacteria without much effort.
Microwave Cleaning
This method uses heat to kill germs inside the sponge. Start by soaking your sponge in a bowl of water mixed with a little soap. Make sure the sponge is fully wet to avoid damage. Place the bowl in the microwave and heat for about one minute. Let it cool before taking out the sponge. The heat loosens dirt and kills bacteria quickly. Rinse the sponge well with clean water after microwaving. This technique saves time and cleans deeply.
Using Olive Oil And Soap
Olive oil helps break down thick makeup stuck in the sponge. Mix a small amount of olive oil with gentle soap. Rub this mixture into the sponge softly to dissolve the makeup. After massaging, rinse the sponge under warm water. Repeat if needed until the sponge looks clean. Olive oil also keeps the sponge soft and prevents it from drying out. This method works well for heavy, stubborn makeup stains.
Frequently Asked Questions
How Often Should I Clean My Makeup Sponge?
You should clean your makeup sponge after every use. This prevents bacteria buildup and keeps your skin healthy. Regular cleaning also extends the sponge’s lifespan and maintains makeup application quality.
What Is The Best Method To Clean A Makeup Sponge?
The best method is using gentle soap or a specialized sponge cleanser. Wet the sponge, lather soap, squeeze out makeup, rinse thoroughly, and air dry. This removes dirt without damaging the sponge.
Can I Use Household Items To Clean My Makeup Sponge?
Yes, you can use mild dish soap or baby shampoo. These effectively break down makeup residue and are gentle on the sponge. Avoid harsh chemicals to prevent damage.
How Long Does It Take For A Makeup Sponge To Dry?
A makeup sponge typically dries within 1 to 2 hours. Ensure it is placed in a well-ventilated area. Proper drying prevents mold and bacterial growth.
Conclusion
Keeping your makeup sponge clean is essential. It helps maintain healthy skin. Regular cleaning removes bacteria and old makeup. Use mild soap and warm water. Squeeze gently to avoid damage. Rinse until the water runs clear. Let it air dry completely.
A clean sponge improves makeup application. It lasts longer and feels better on the skin. Make this routine a habit. Enjoy a fresh and flawless makeup experience every time. Clean sponges make a difference. Follow these simple steps for best results.
Your skin and makeup routine will thank you.
